Creating and analyzing geofence and tower dump cases
You can create and analyze geofence and tower dump files using the Manage file screen's Target development preview tab and the Target development view on the ESPA analysis center.
Video series:
This topic explains how to upload geofence and tower dump files to a case and then analyze the data using the Target development analysis.
Geofence and tower dump files are files that contain call records for a specific location rather than for a specific phone number. They can help you to identify unknown potential suspects near to a locations such as crime scenes. If you are interested in what phones were in a specific location at a specific time you can request that each operator provides you, for the time period of interest, tower dump and geofence records covering the location. These two types of records provide you with the same information but the geofence records additionally provide TA (timing advance) data. The timing advance data can increase the success rate of solving a crime.
How the operators supply this data varies between them, for example some operators provide all the records for multiple locations in one file while others provide one file per cell tower. The following procedure recommends the order in which you upload each operator's data and the settings that are required. Once imported you can analyze the results on the Target development preview tab and also view them on the ESPA analysis center screen. Based on the analysis results, if there are devices you are interested in you can select them and add the devices and their associated calls into the case which allows you to use these records as you would CDR records that were supplied for a specific phone number.
For short videos showing how to use the target development analysis to analyze geofence and tower dump files click the following links.
NOTE: The files you upload must be the original files you received from the operator and not ones which you have edited.
For geofence and tower dump cases you can either manually create your locations before or after uploading the files, or you can allow OSS-ESPA to automatically create locations for you from the data in the files. The following procedure details the later option, where OSS-ESPA creates them automatically, and provides recommendations on the order of uploading your files.
-
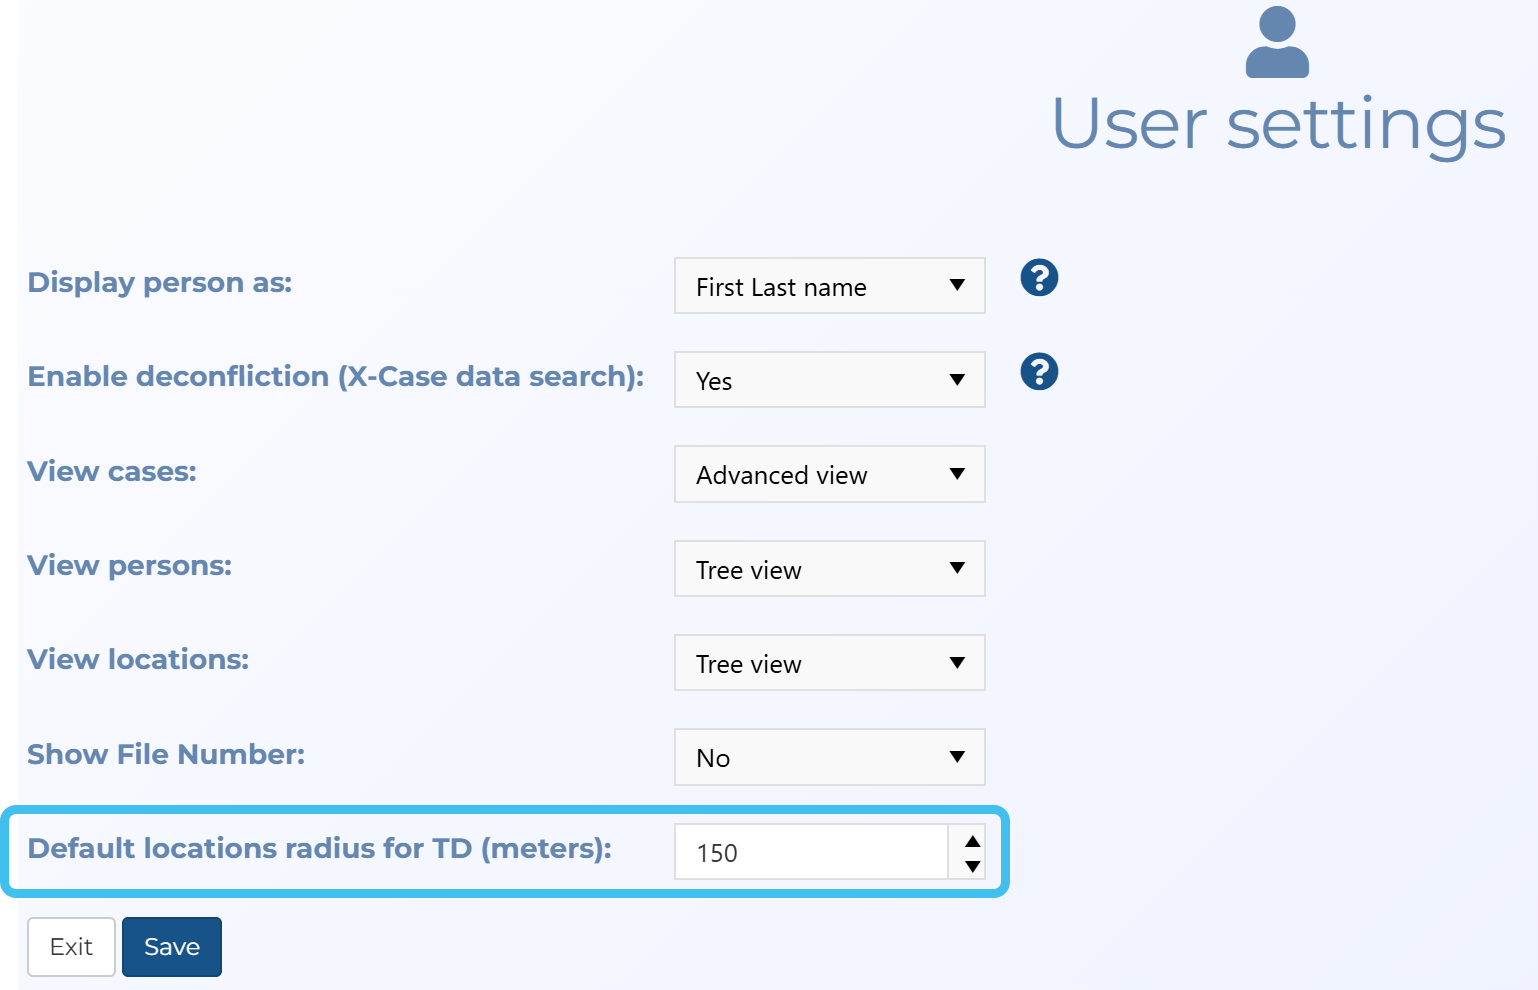
This step is optional. If you prefer to set all your location buffers to a specific distance rather than use the location buffer defined in the target development file then set Default locations radius for TD (meters) to your required distance. If this setting is left blank or is set to 0, then the location buffer in the target development file is used. To change this setting, from the main menu click Settings, Account settings, then in User preferences click Settings.
-
For the case you want to upload geofence and tower dump files to, open the Manage case screen.
 Need help finding your case?
On the main menu click View cases. The screen that opens depends on your setting of View cases. If it is set to:
- Advanced view, then the Advanced view cases screen opens.
- If your case is listed on the Favorite & recent cases tab, click the case name to open the Manage case screen.
- If it is not listed on the Favorite & recent cases tab, then click the Cases tab. Use the search filters to help locate your case. You can also click
 to open the FILTERS group which allows you to set your own default filter defining what is displayed on this tab, for example you may wish to set it to cases that you created which are currently open.
For further information refer to Searching for a case.
- Grid view, then the View cases screen opens.
- If your case is listed under My recent cases click it to open the Manage case screen.
- If it is not listed under My recent cases then select your case from the table, using the search filters to help locate it if required. Note, by default the search is set to only display cases that you created; if you are not the original creator but an assignee then ensure you set Case filter to Assigned cases before clicking Search.
- Tree view, then the View i-cases screen opens.
- Click
 at the top-right of the screen to open either the View Cases or Advanced view cases screen and follow the above description.
- Click
- Advanced view, then the Advanced view cases screen opens.
-
On the Manage case screen click Upload more files.
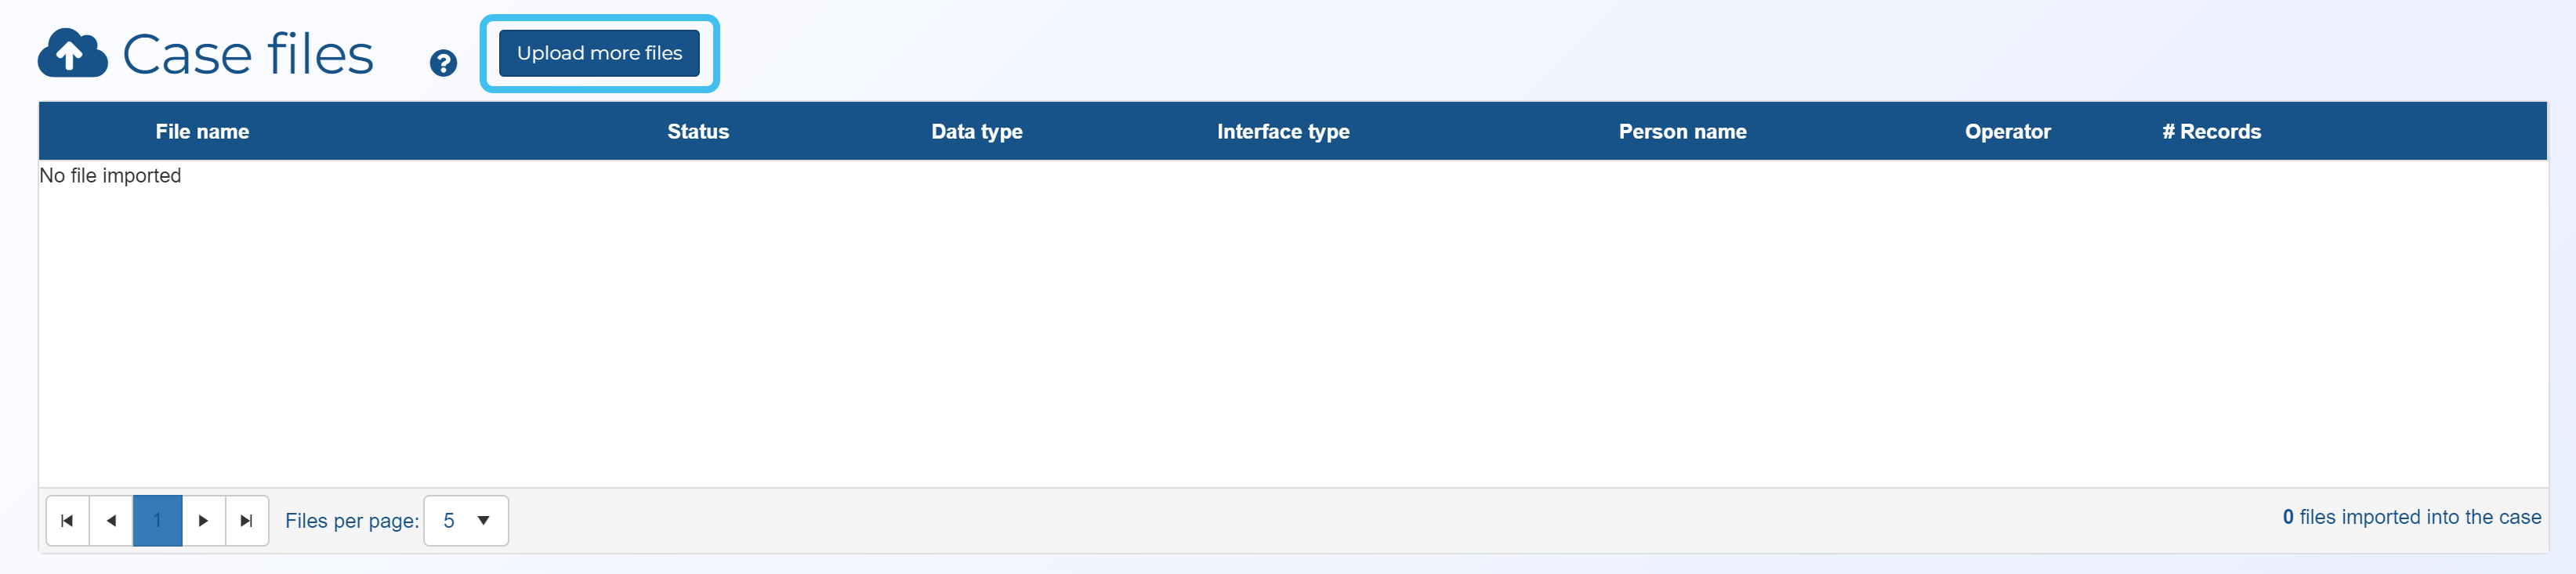
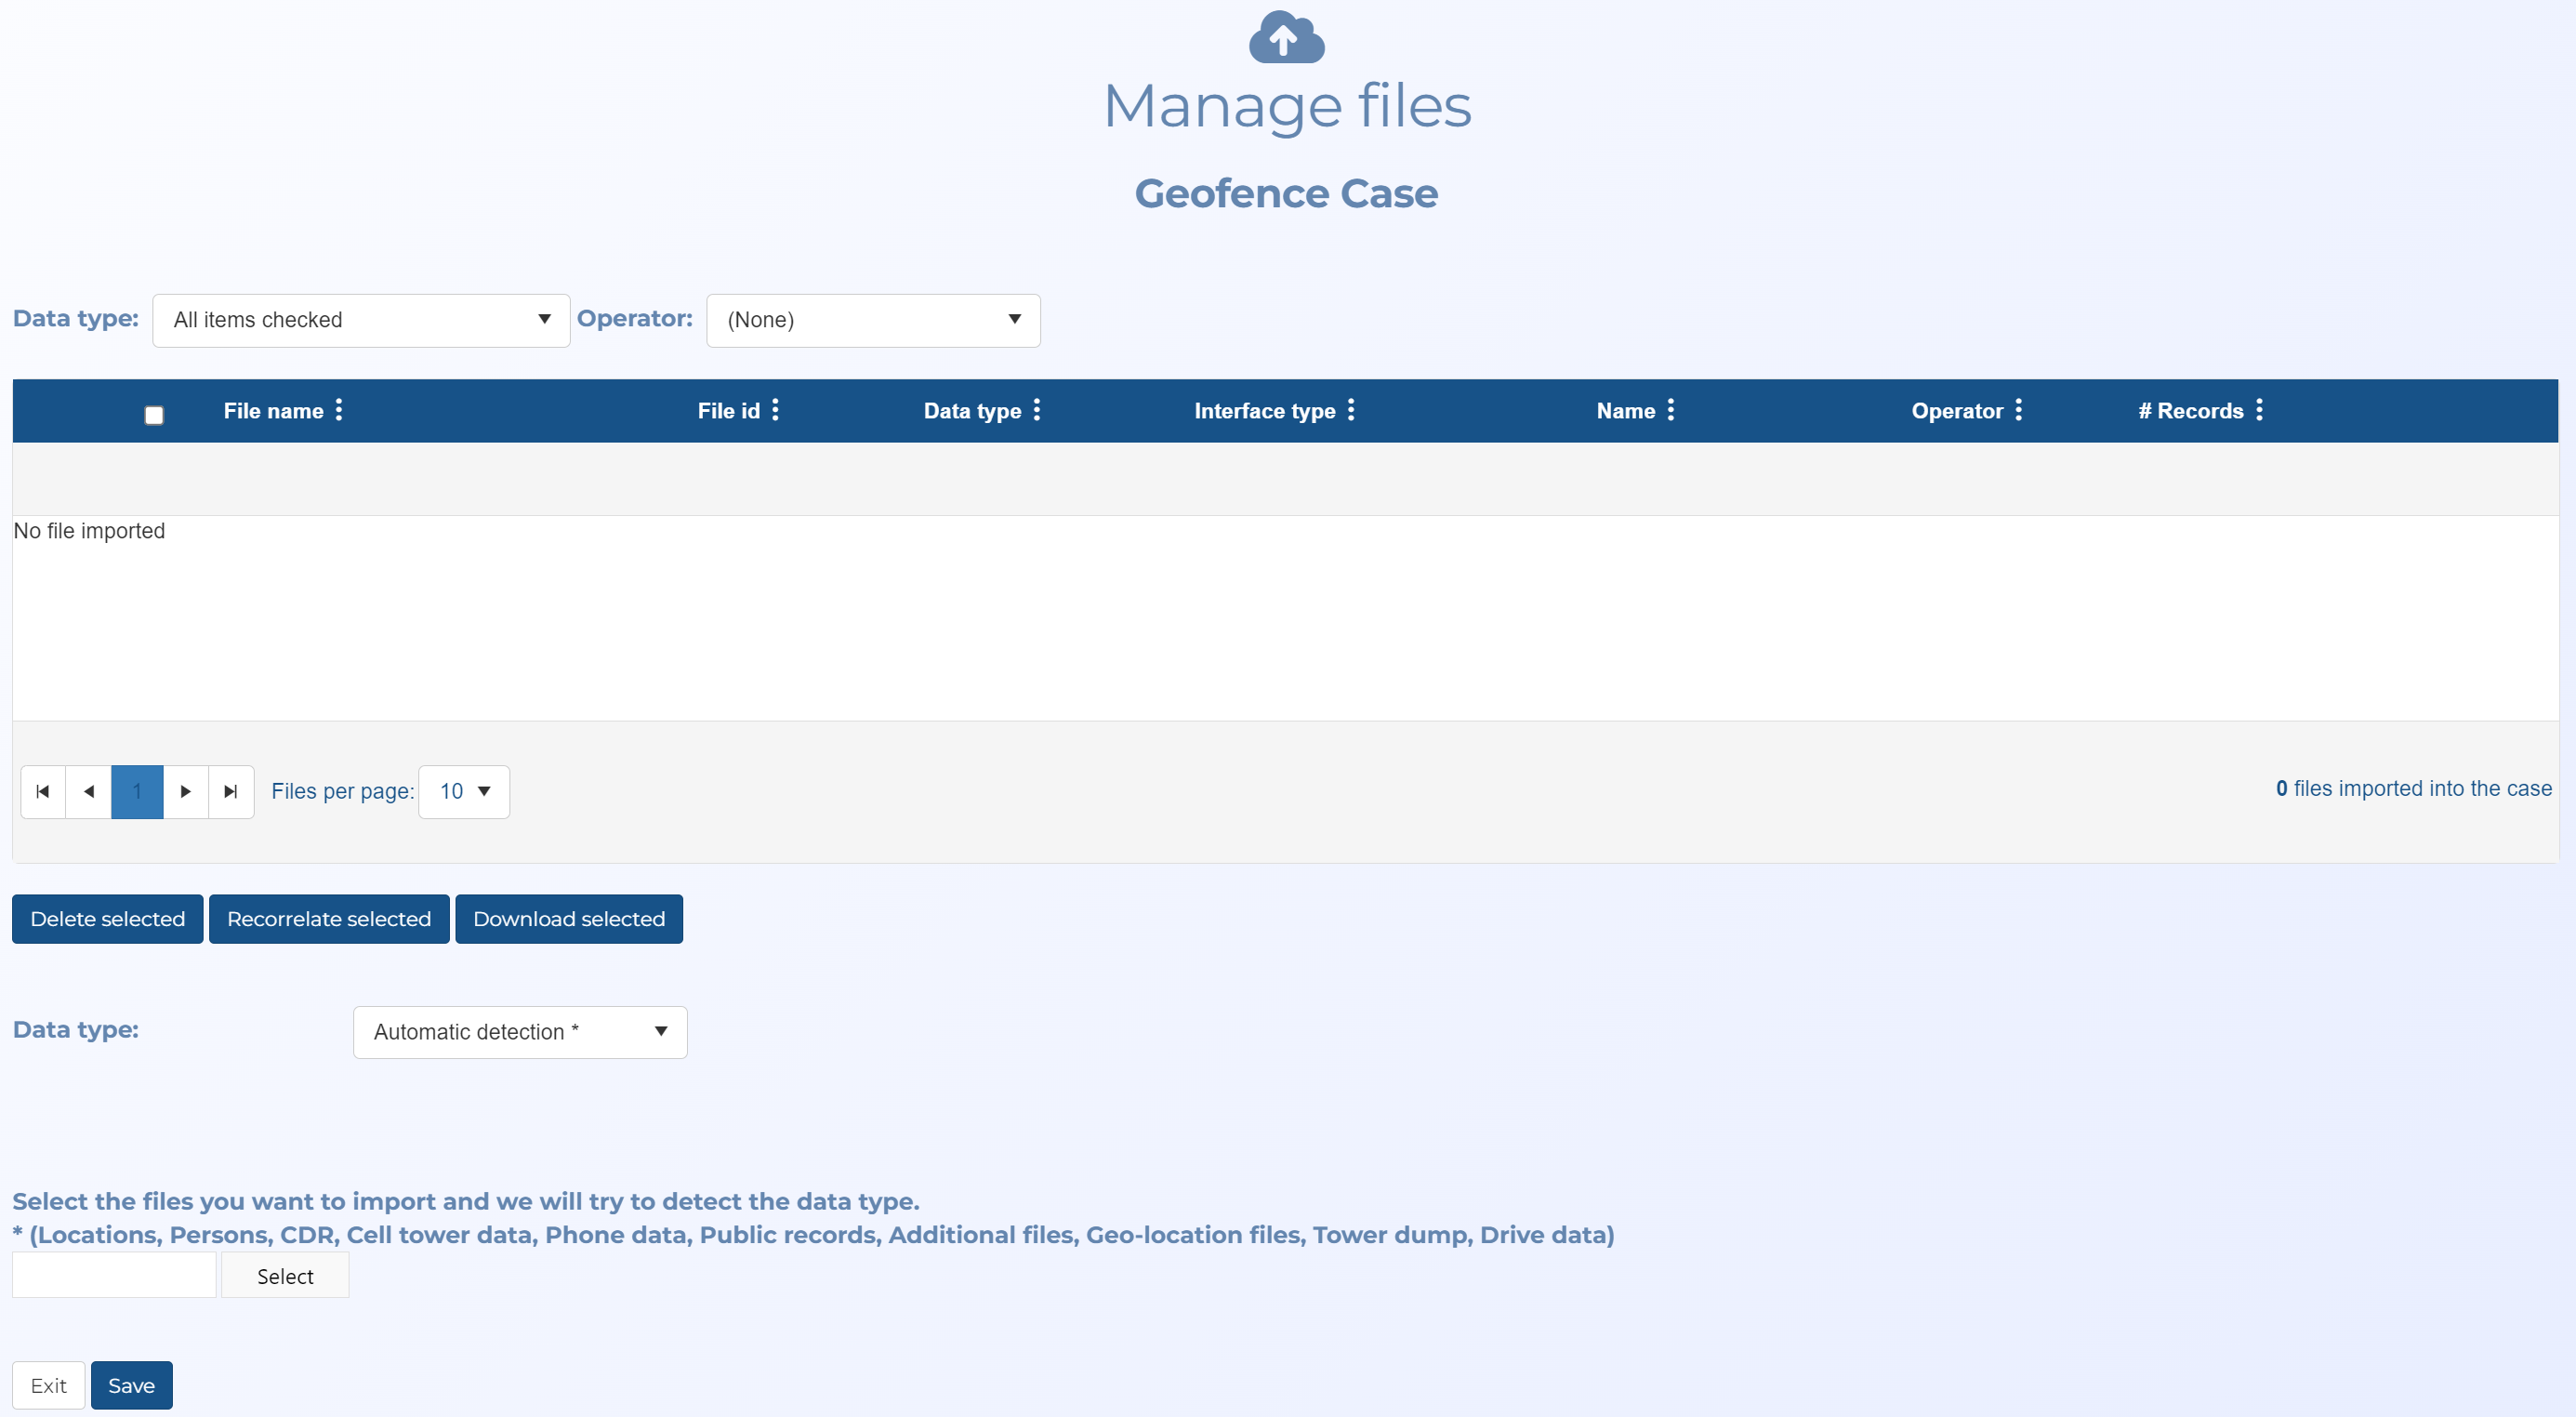
The Manage files screen opens.
-
You must now upload your files selecting the appropriate settings in Data type and File location. To simplify the process, if you have files from multiple operators then it is recommended you upload them in the following order by operator, rather than uploading them all together as the best method of importing the files differs between each operator and file type.
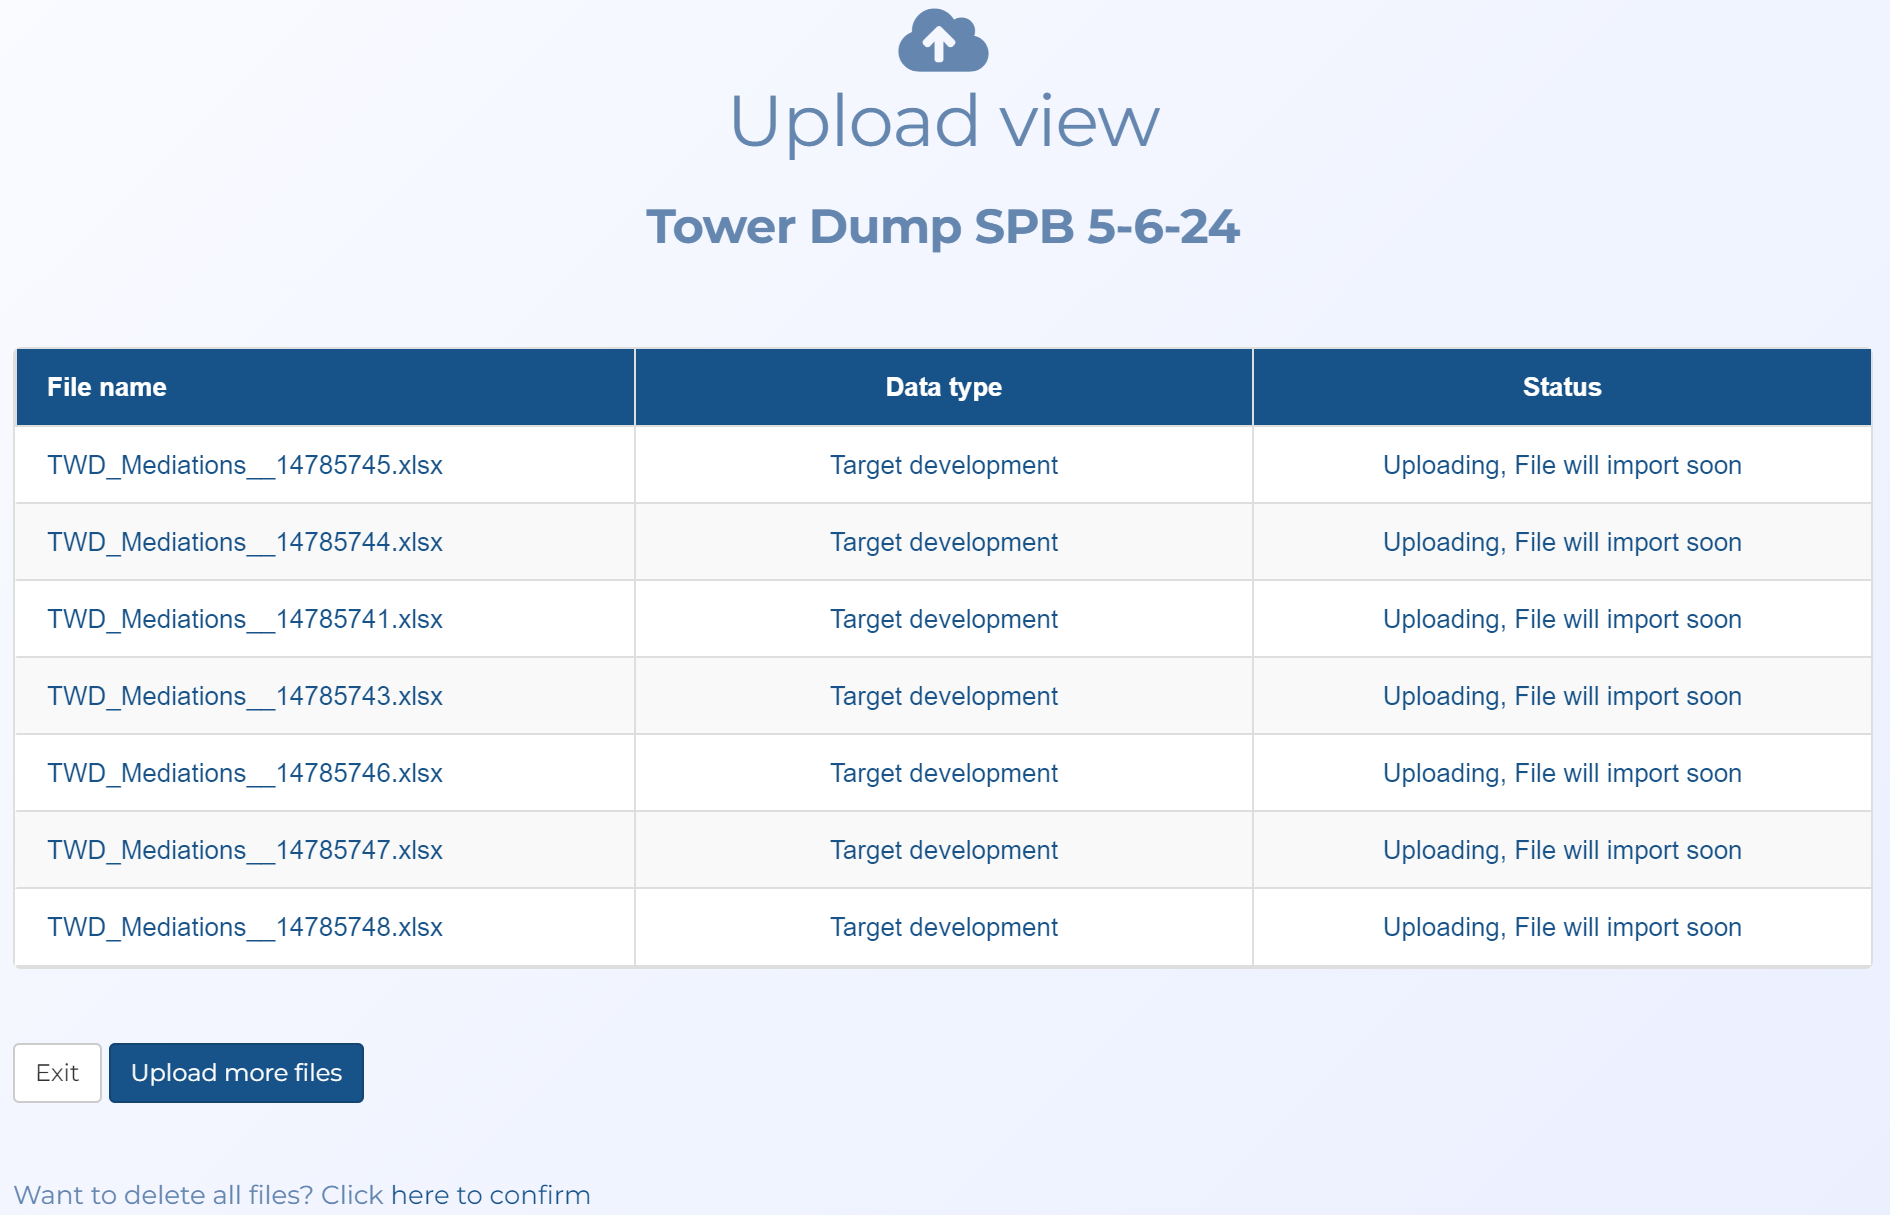
After selecting the settings for each file type, as detailed in the steps below, to upload the files, click Select. Windows Explorer opens. Navigate to the folder and select the required files. The files upload and a green circle alongside the file name indicates when the upload is complete. Click Save. The Upload view screen lists all the files you selected to import and the import status.
-
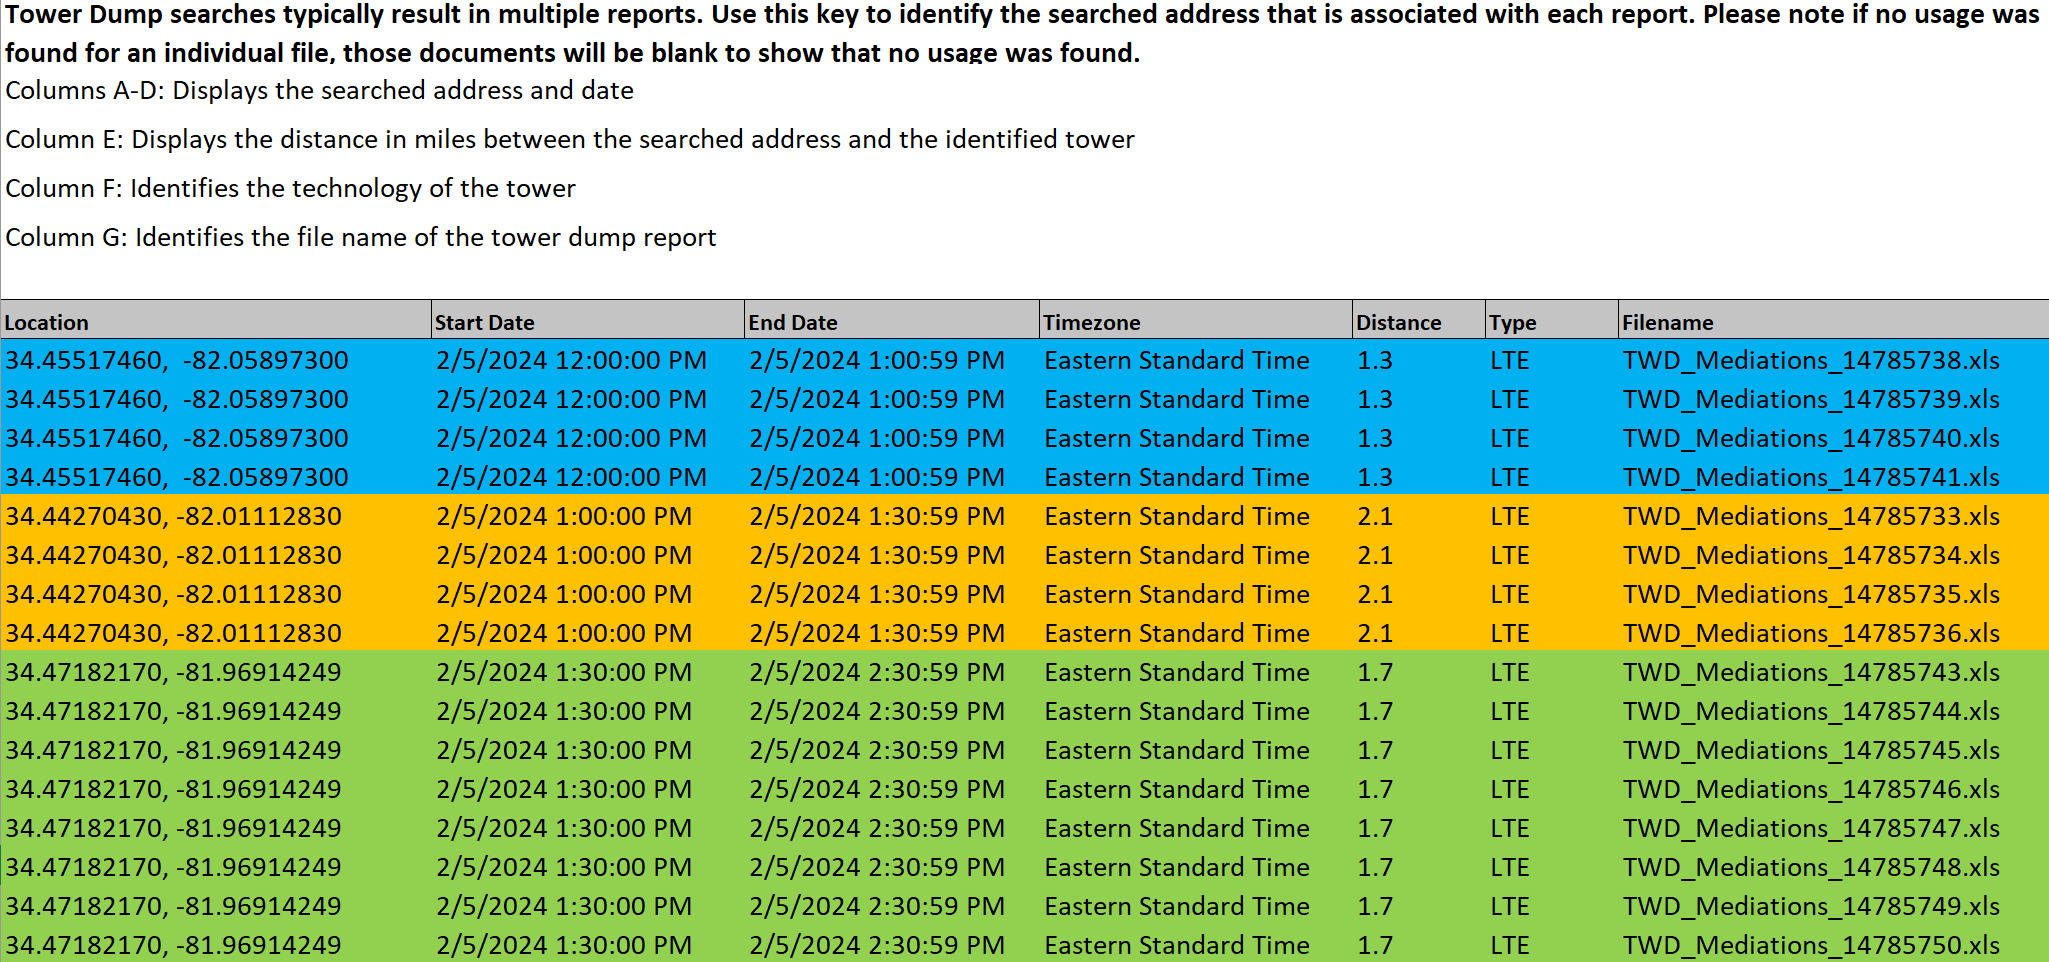
T-Mobile provides a key for their tower dump files. If you have this then upload it first with Data type set to Automatic detection. This is useful as it automatically creates all the locations and events that are in the key. A sample of a T-Mobile key file is shown below. Note, T-Mobile does not provide a key for their geofence files, they provide the latitude and longitude in the file header name.
-
Upload your T-Mobile tower dump files with Data type set to Target development and File location set to Detect location in key file. This then imports the files and automatically associates them to the correct locations and events.
-
Upload your T-Mobile geofence files with Data type set to Target development, and File location set to Detect location in the file.
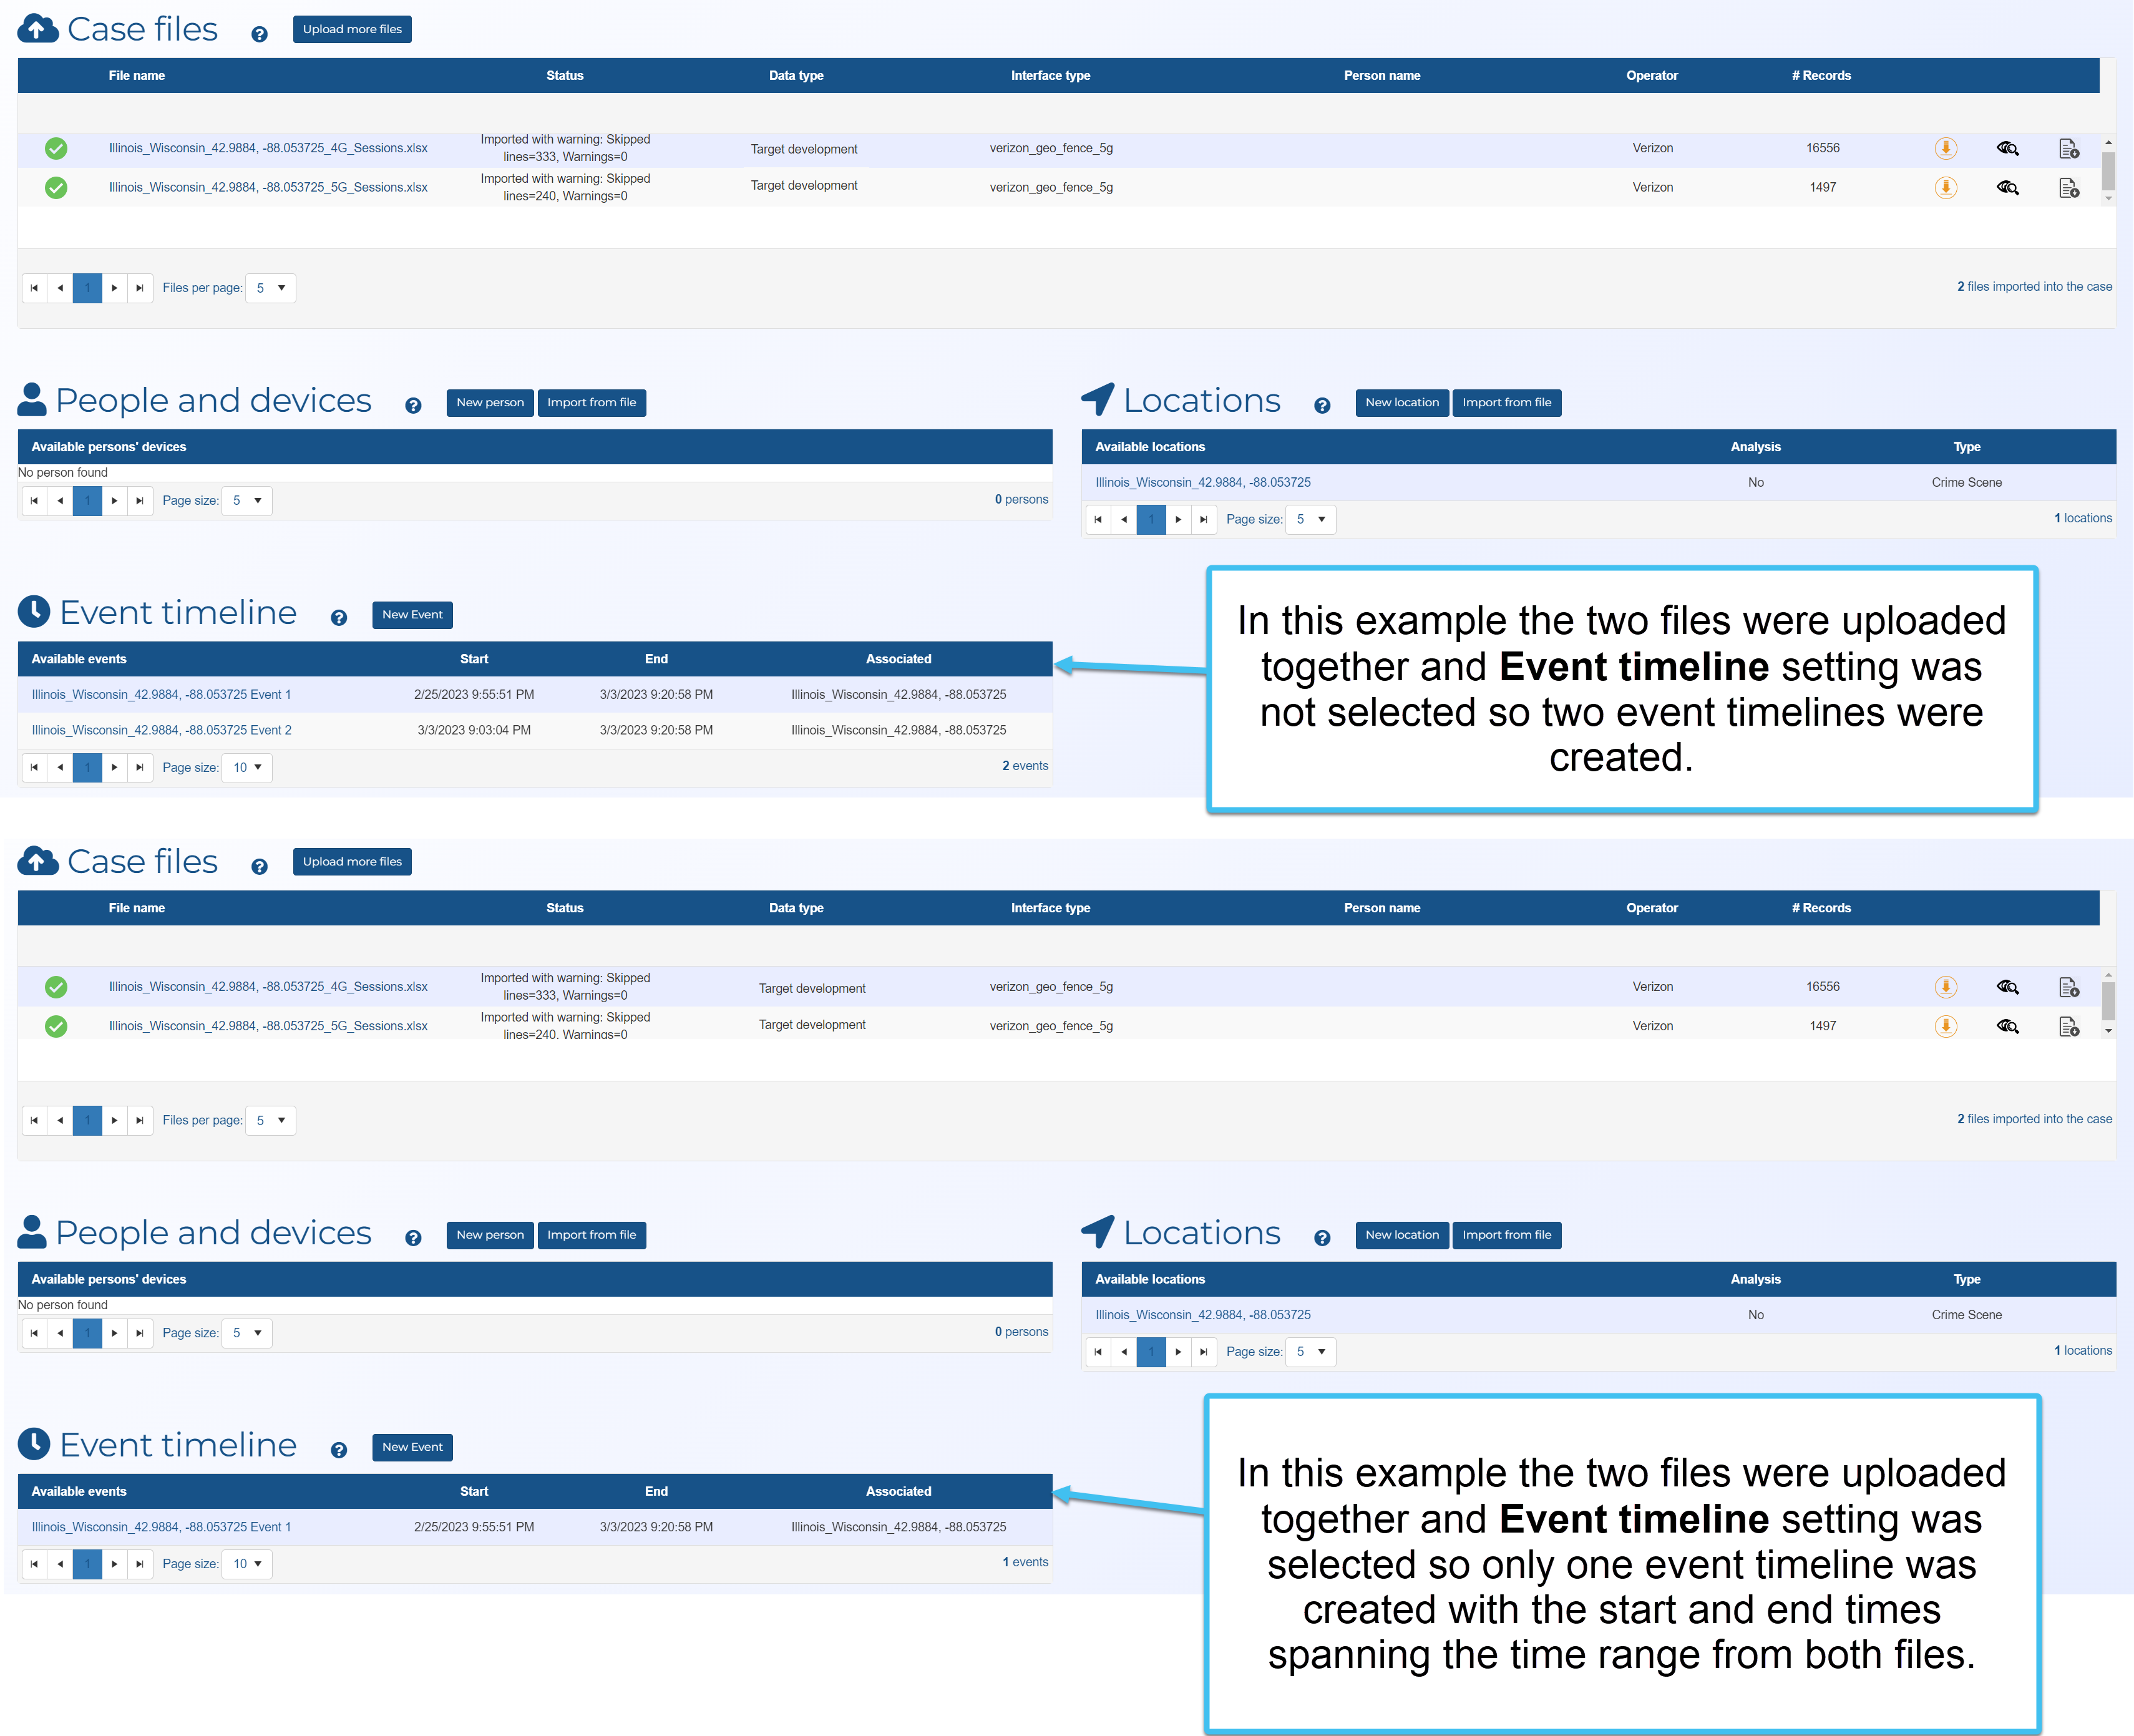
Select Event timeline if you want to create just one event for the files you are about to select.
NOTE: Some operators, such as T-Mobile, supply multiple geo-fence files for the same location each covering only a short period of time, such as 15 minutes. OSS-ESPA creates only one event if the time frame is 4 hours or less. For example, if you have four geo-fence files for the same location covering time frames of 10:00-10:15, 10:15-10:30, 10:30-11:00 and 11:00-11:30, the overall time period is 1.5 hours and only one event is created.
The following example shows two files that were uploaded with and without Event timeline selected.
-
Upload your ATT tower dump files with Data type set to Target development, and File location set to Detect location in file.
-
Upload your ATT geofence files with Data type set to Target development, and File location set to Detect location in file.
-
Although not as commonly available, if you have USCellular files, upload them using the same method as for the ATT files.
-
Before uploading your Verizon tower dump files you must open them to verify whether or not they contain locations. Prior to July 2024 the locations were not included in the files, but since July 2024 the locations may be included. If the location:
-
is not included in the file then upload the files with Data type set to Target development, and File location set to the appropriate location previously created by the earlier imported files.
-
is included in the file then upload the files with Data type set to Target development, and File location set to Detect location in file.
-
-
Upload your Verizon geofence files individually with Data type set to Target development, and File location set to the appropriate location previously created by the earlier imported files.
NOTE: For Verizon geofence files you must select a location because the files do not contain the location, but instead detail the longitude and latitude as part of the file name. It is recommended that with Verizon geofence files that you first create the location then import the geofence files to the location. If you do not have the appropriate locations created automatically by the other operator imports then you must create them manually before you can upload the Verizon geofence files.
-
Although not as commonly available, if you have Google geofence files upload these files with Data type set to Target development, and File location set to the appropriate location previously created by the earlier imported files.
Having problems uploading your files?
If the files you are importing are very large, the import may fail. For example Verizon geofence files are often large and can consist of 0.5 to 1 million rows.
To resolve this, select Skip analysis process to first import and then you must run the analysis by clicking Reconsolidate default analysis on the Target development management tab.
Click for details of each File location option
- Define location later: This can be used for both single location and multiple location files. OSS-ESPA creates individual files for each location in the uploaded file but it does not assign them to any location. This allows you to select any location from those defined in your case, at a later date using the Target development management tab.
- Automatically create a generic location: This can be used for both single location and multiple location files. OSS-ESPA creates individual target locations and target development files for each location in the file and names these locations as "Location <n>".
- Detect location in the file: This setting is only applicable to ATT, T-Mobile and US Cellular files with multiple locations. OSS-ESPA creates individual target locations and target development files for each location in the file and names these locations based on the location identifiers that are detailed in the uploaded file. The location identifiers may be an address, a latitude/longitude or a reference name.
- Detect location in key file: This can be used for T-Mobile tower dump files. Firstly you must upload the T-Mobile key file, with Data type set to Automatic detection, which automatically creates all the locations and events that are in the key. If you then upload the tower dump files using Detect location in key file, it automatically assigns the correct tower dump file to the locations created previously by the key file.
-
-
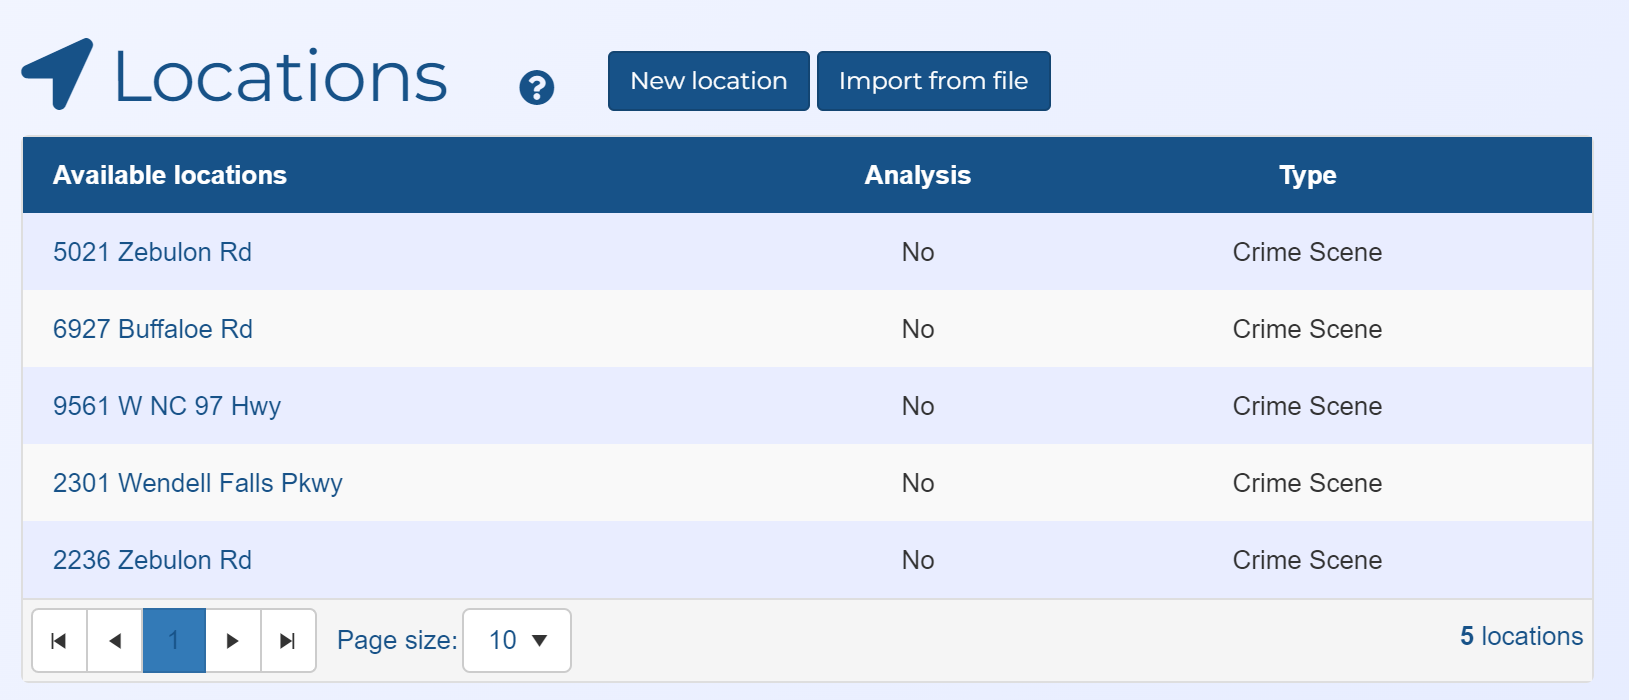
Once your files have uploaded they are listed in Case files; generic locations and events that were created are listed in Locations and Event timeline respectively. If required you can rename a location name by clicking Locations to open the Locations of interest screen, then editing and saving the location name. It is recommended you rename the latitude/longitude named locations to something more useful such as "Crime scene 1" and "Body recovery location". It is also recommended that a reasonably sized Location buffer is set, such as 25 or 50 meters.
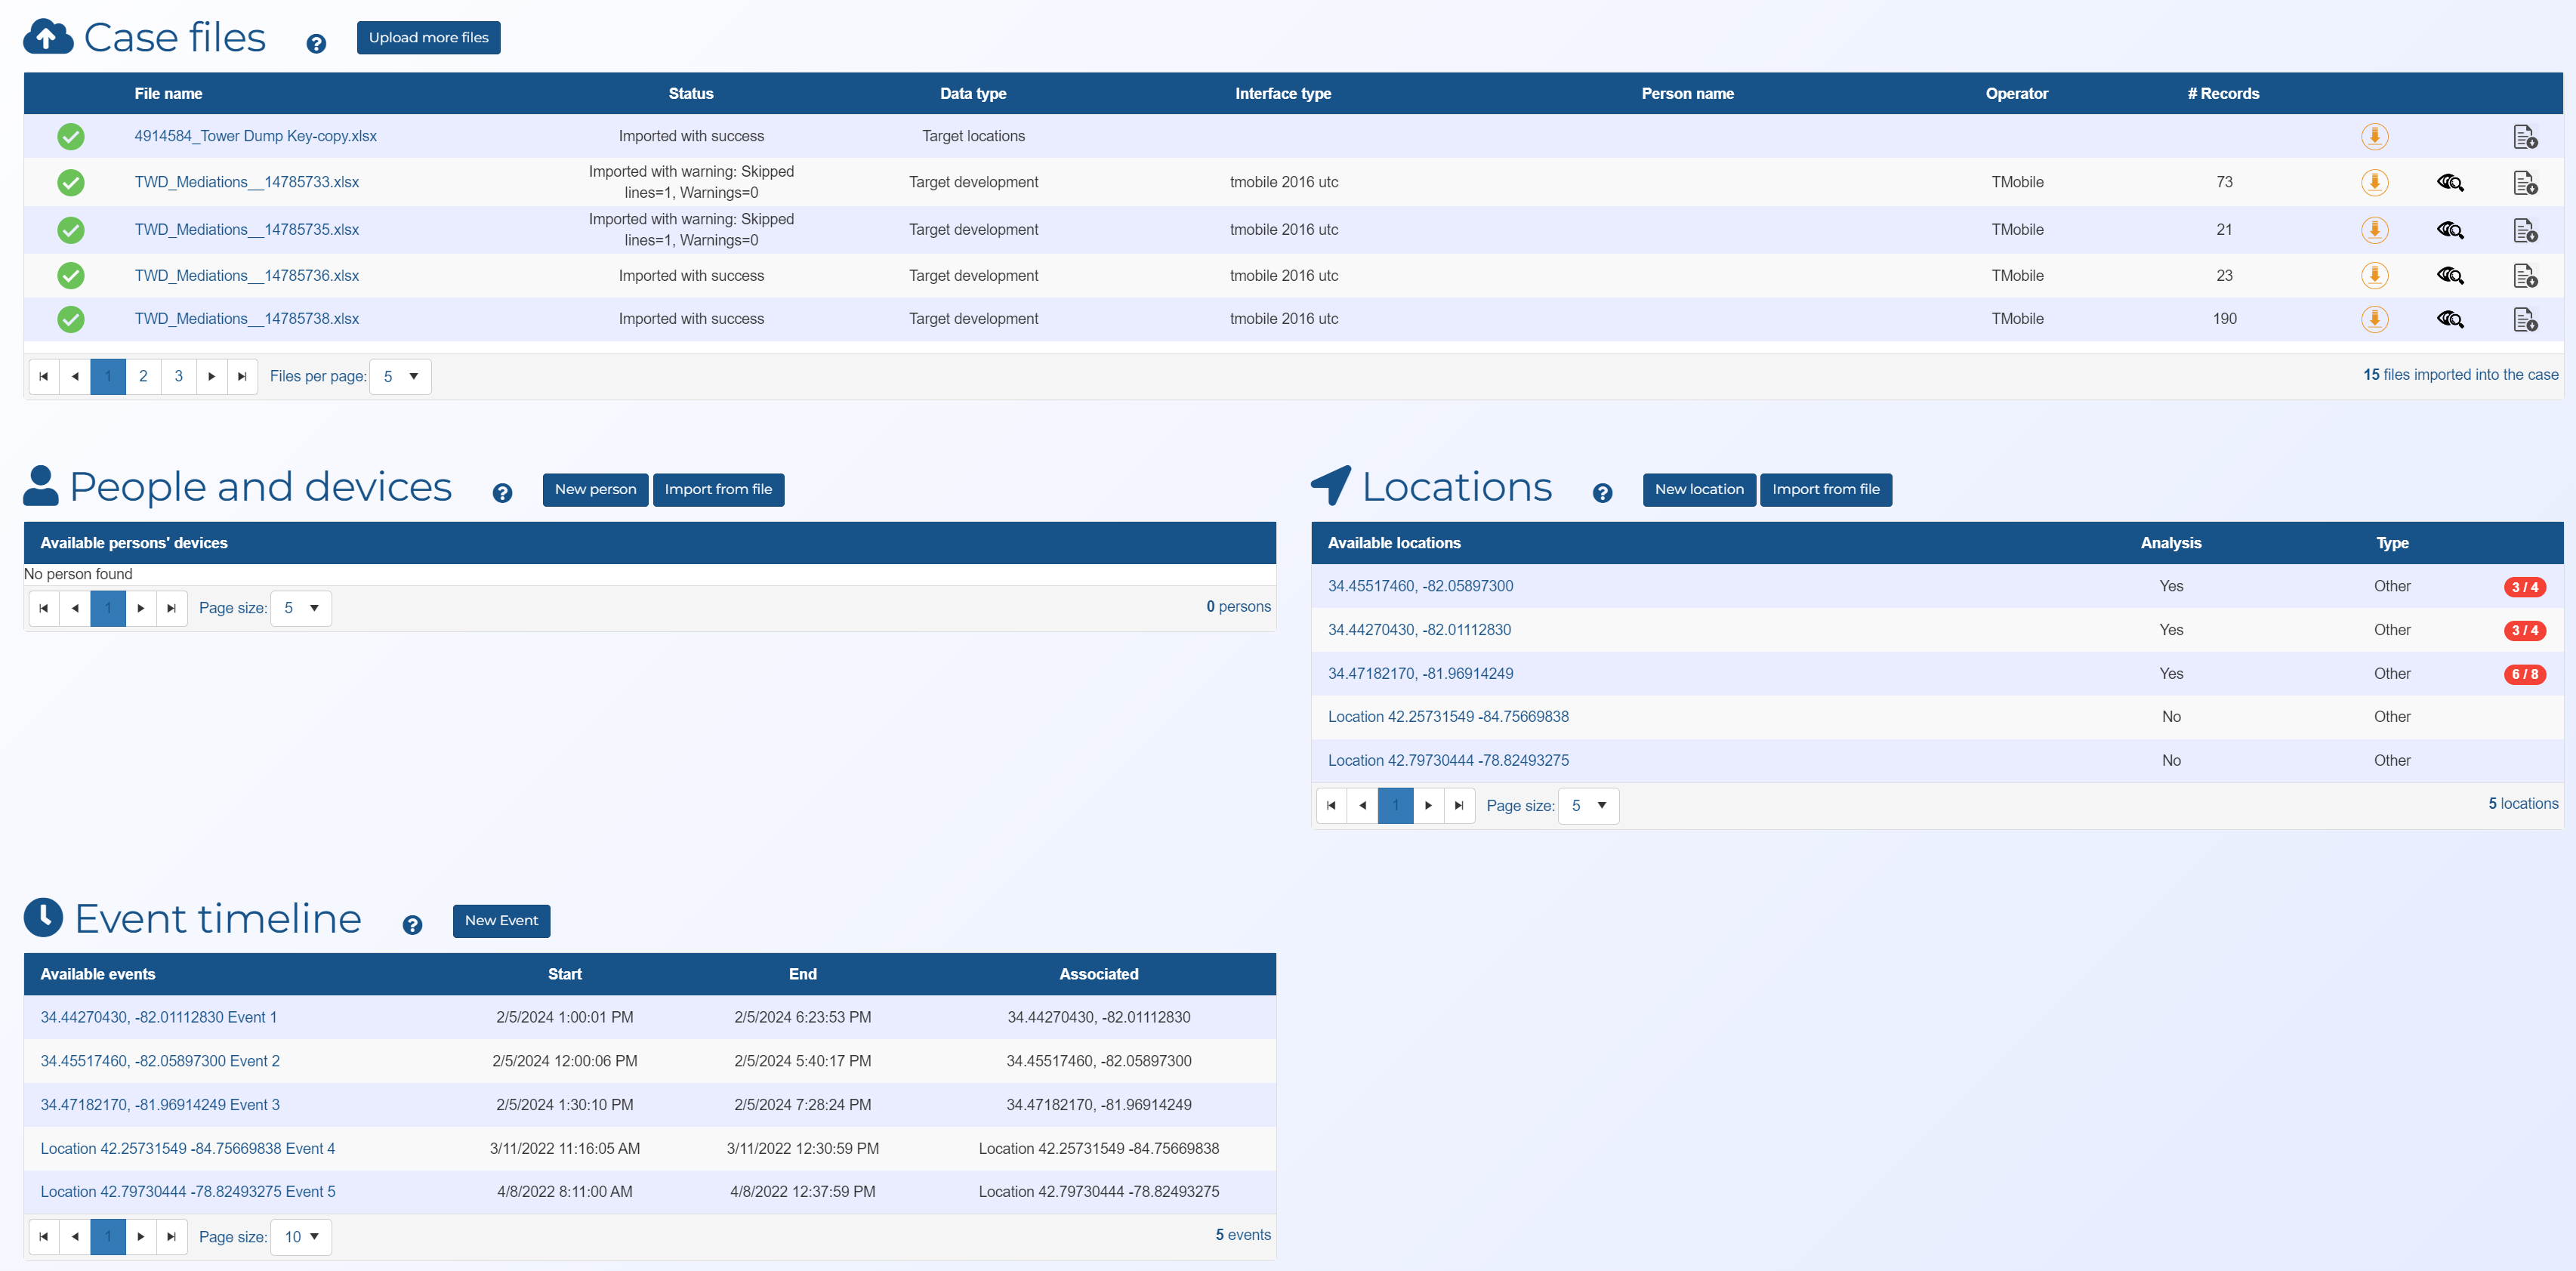
Note, sometimes T-Mobile sends tower dump files with no data. To highlight how many of the imported files contained data a number is displayed at the end of each location's row, as shown in the above graphic. For example,
 indicates that 4 files were uploaded to the location but only 3 contained data.
If you have made any changes to the location names or location buffer then ensure you click Reconsolidate default analysis.
-
If required you can also manually enter new locations on the Locations of interest screen. You may need to do this to resolve a correlation issue if you selected to automatically detect multiple locations in a file and OSS-ESPA created more file outputs than locations. You must then apply these new locations to the correct files in the following step.
-
On the Manage files screen, click
 to expand the Target development management tab.
-
Ensure that the correct files match the correct locations.
If you created new locations in the previous step then you can also apply the location to the required file, or if you chose to Define location later, or if you had previously created locations for the file to match to, then this is also where you must match the files to the correct locations.
- OSS-ESPA does not process time zone adjustments prior to analysis, so if your file is being uploaded to locations that have already been created with dates and times, then use Timezone adjustment (hours) to enter the time zone adjustment.
- If you have separate crime locations, then date and times are not needed to conduct the analysis.
-
-
If you have made any changes in the previous steps then ensure you click Reconsolidate default analysis.
-
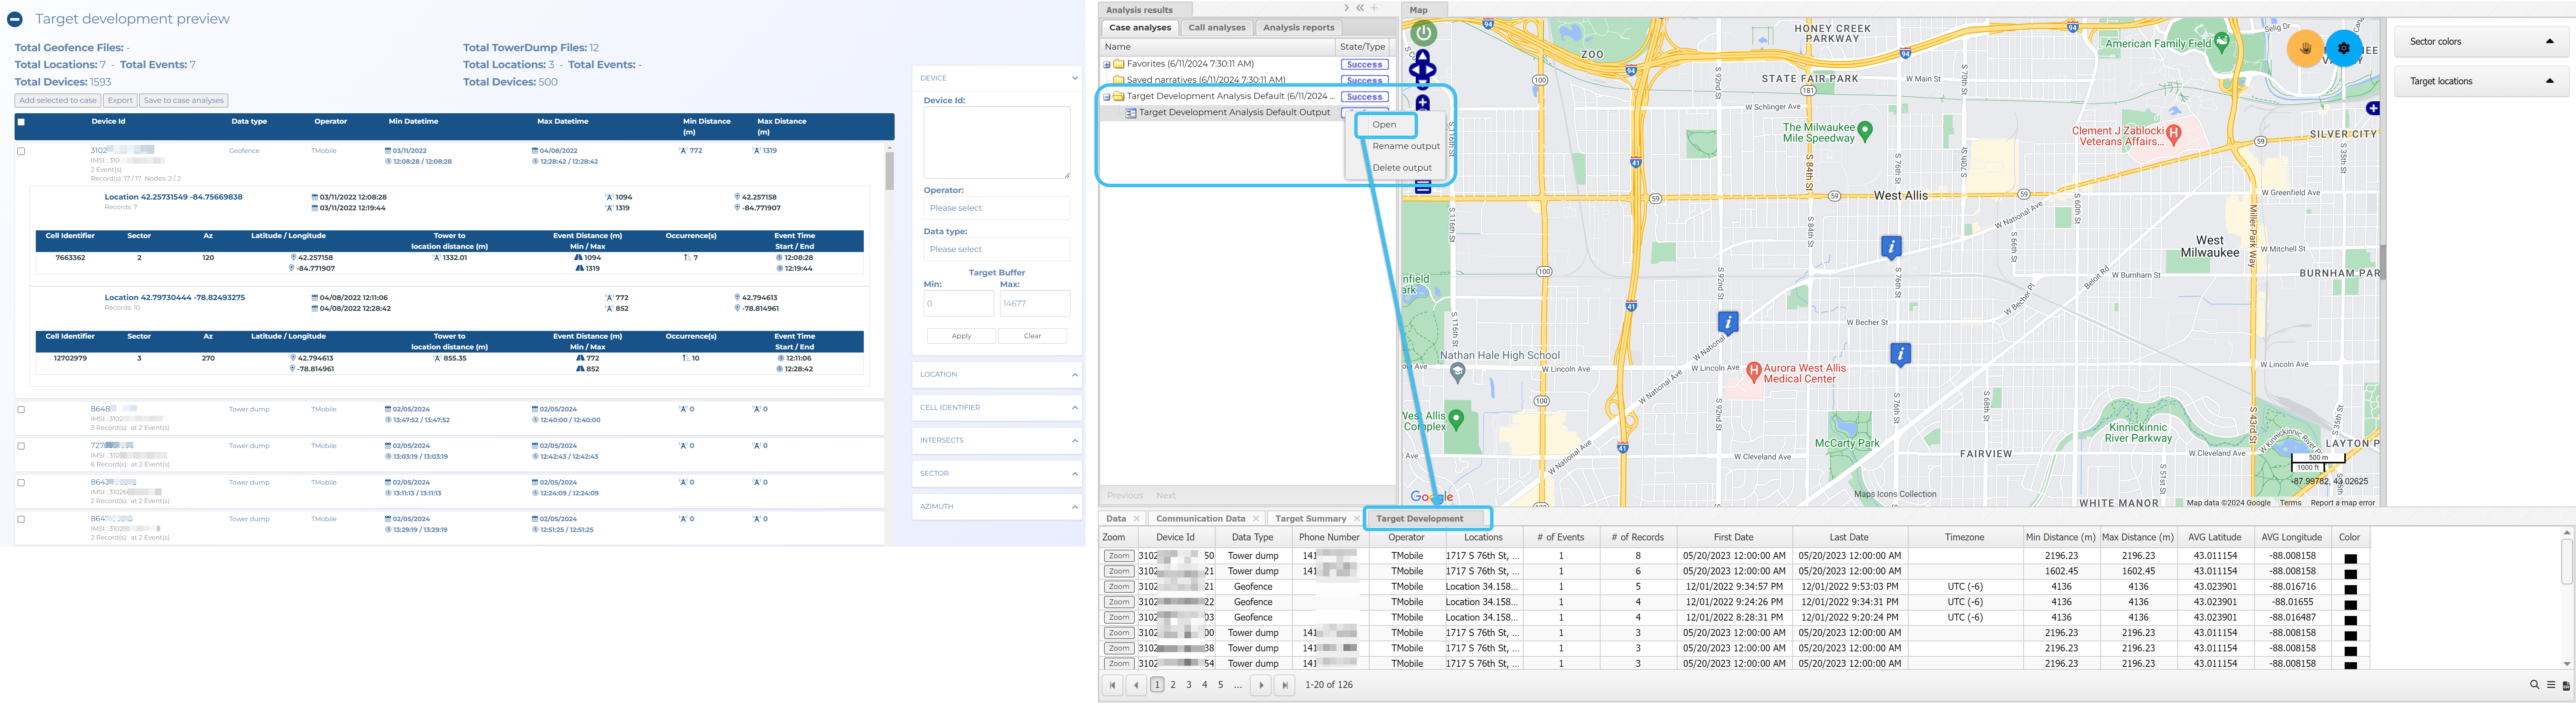
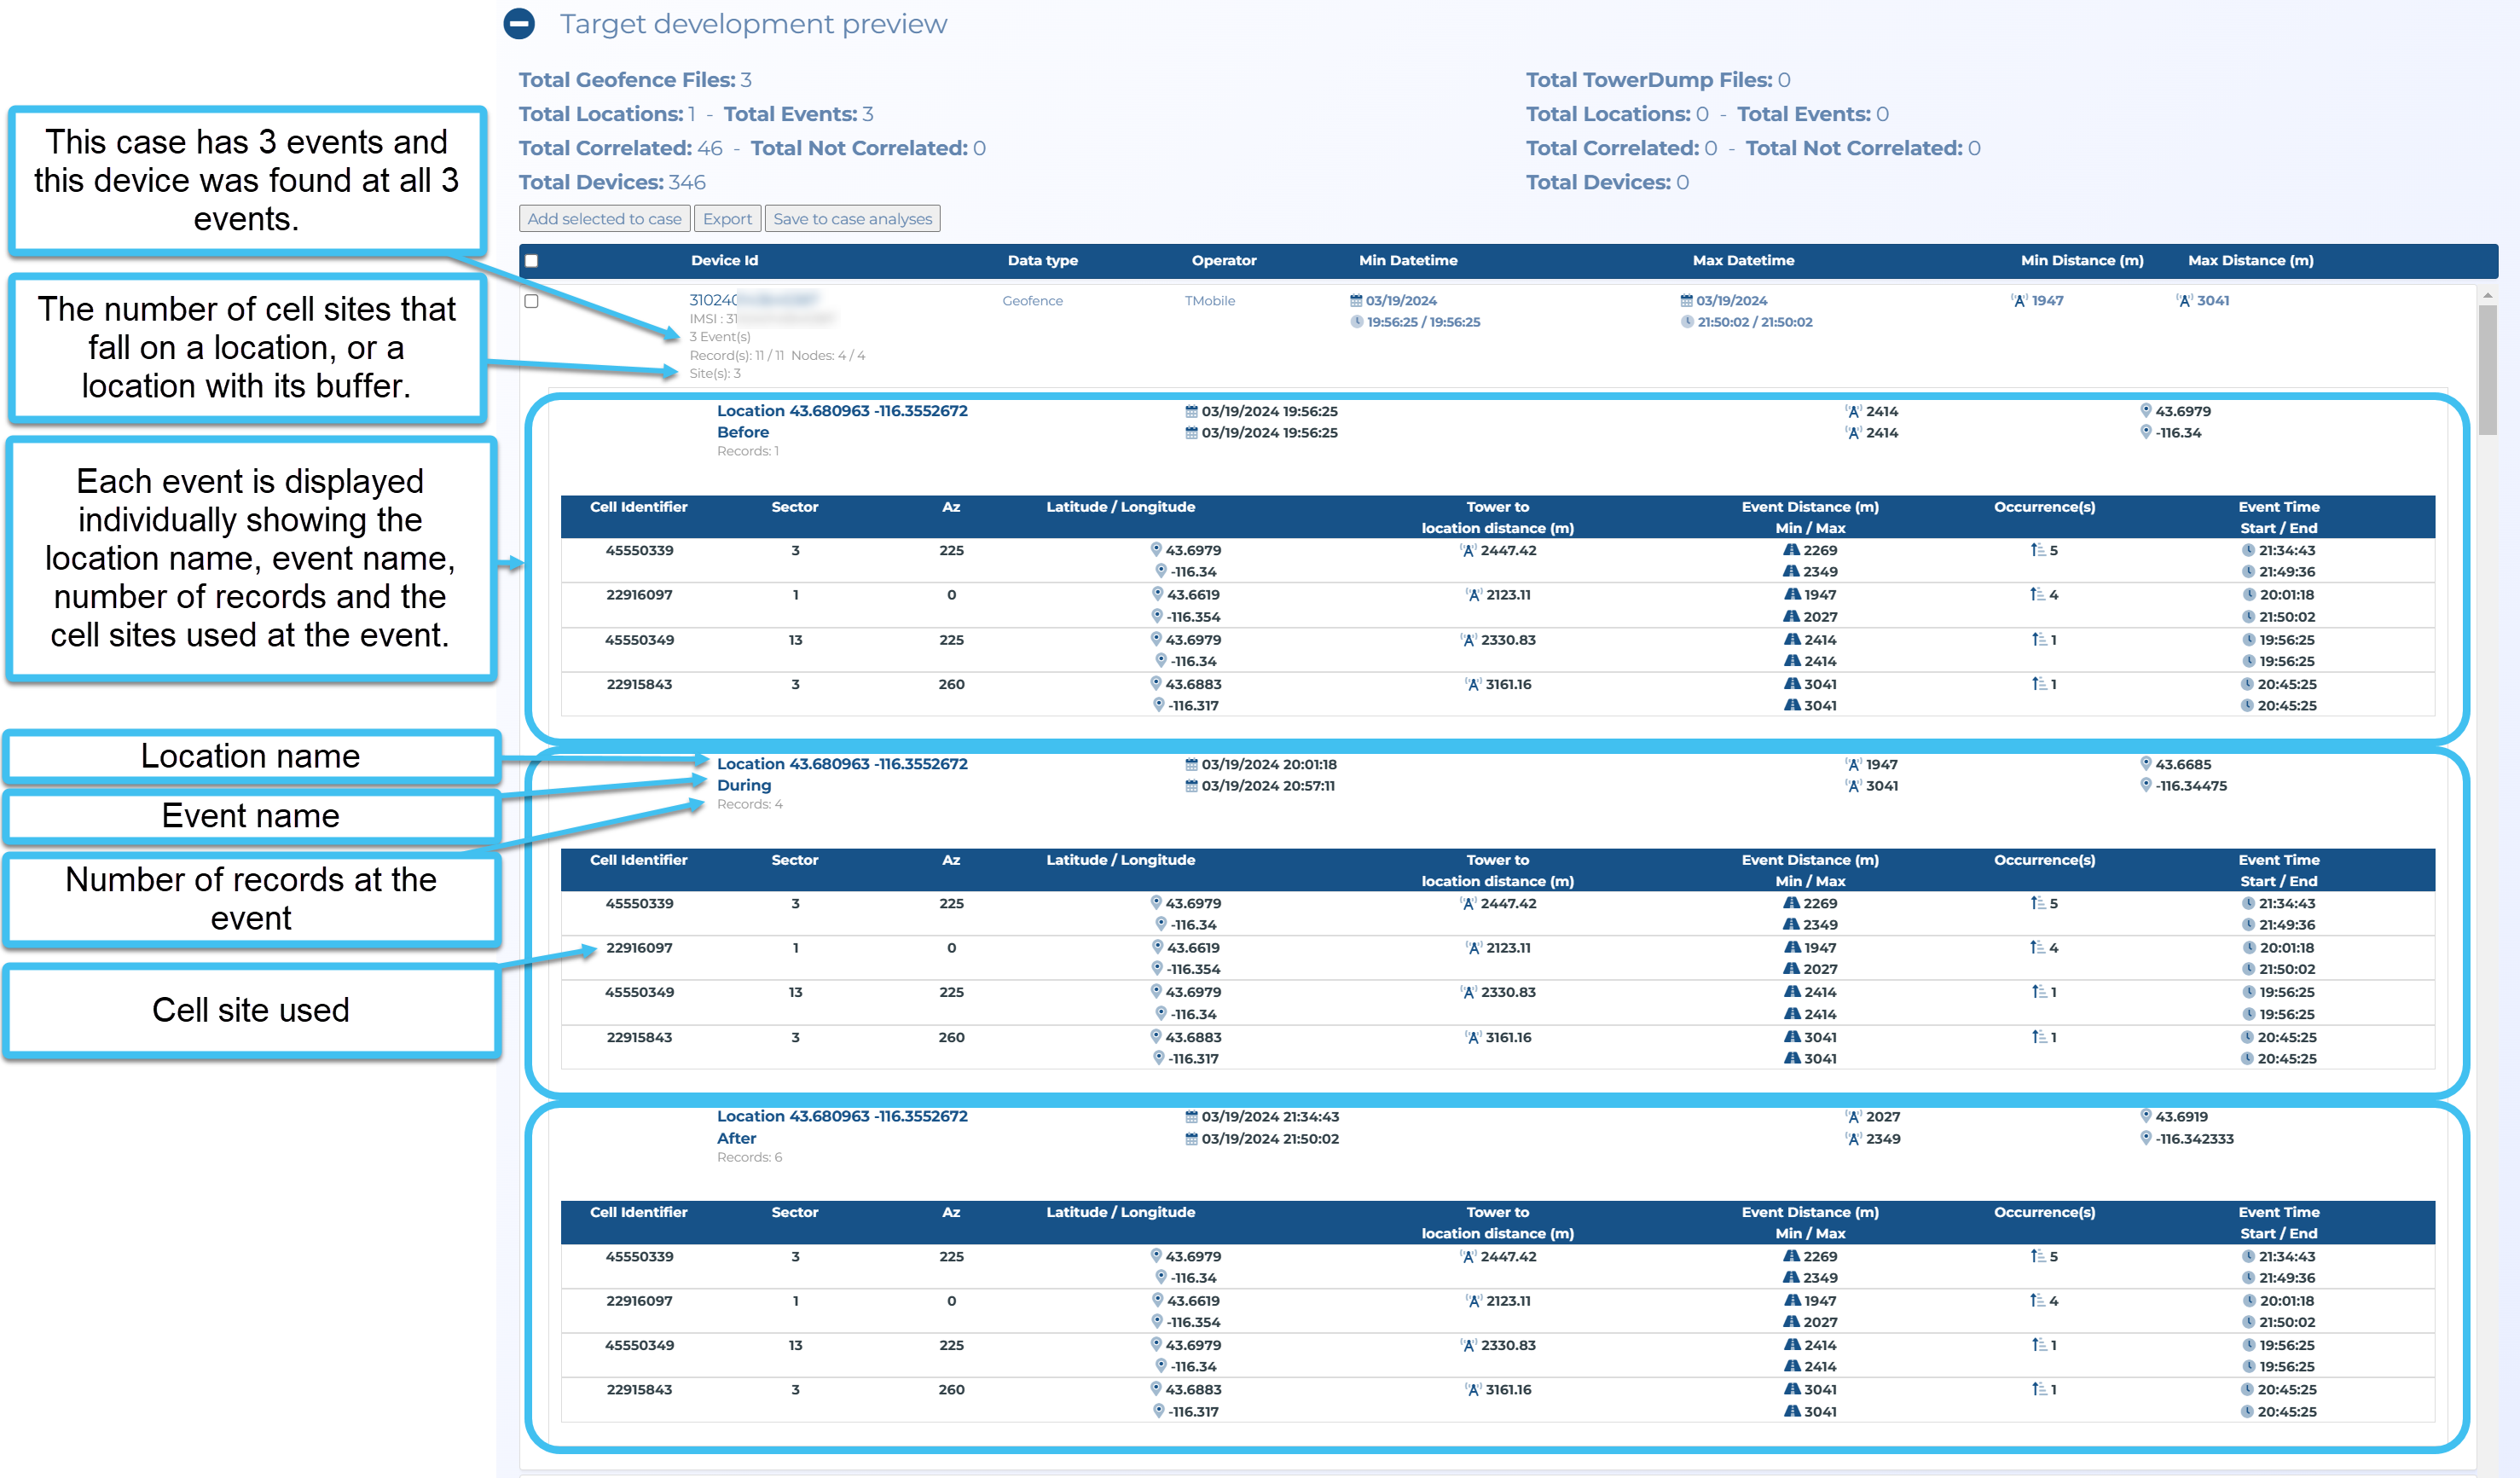
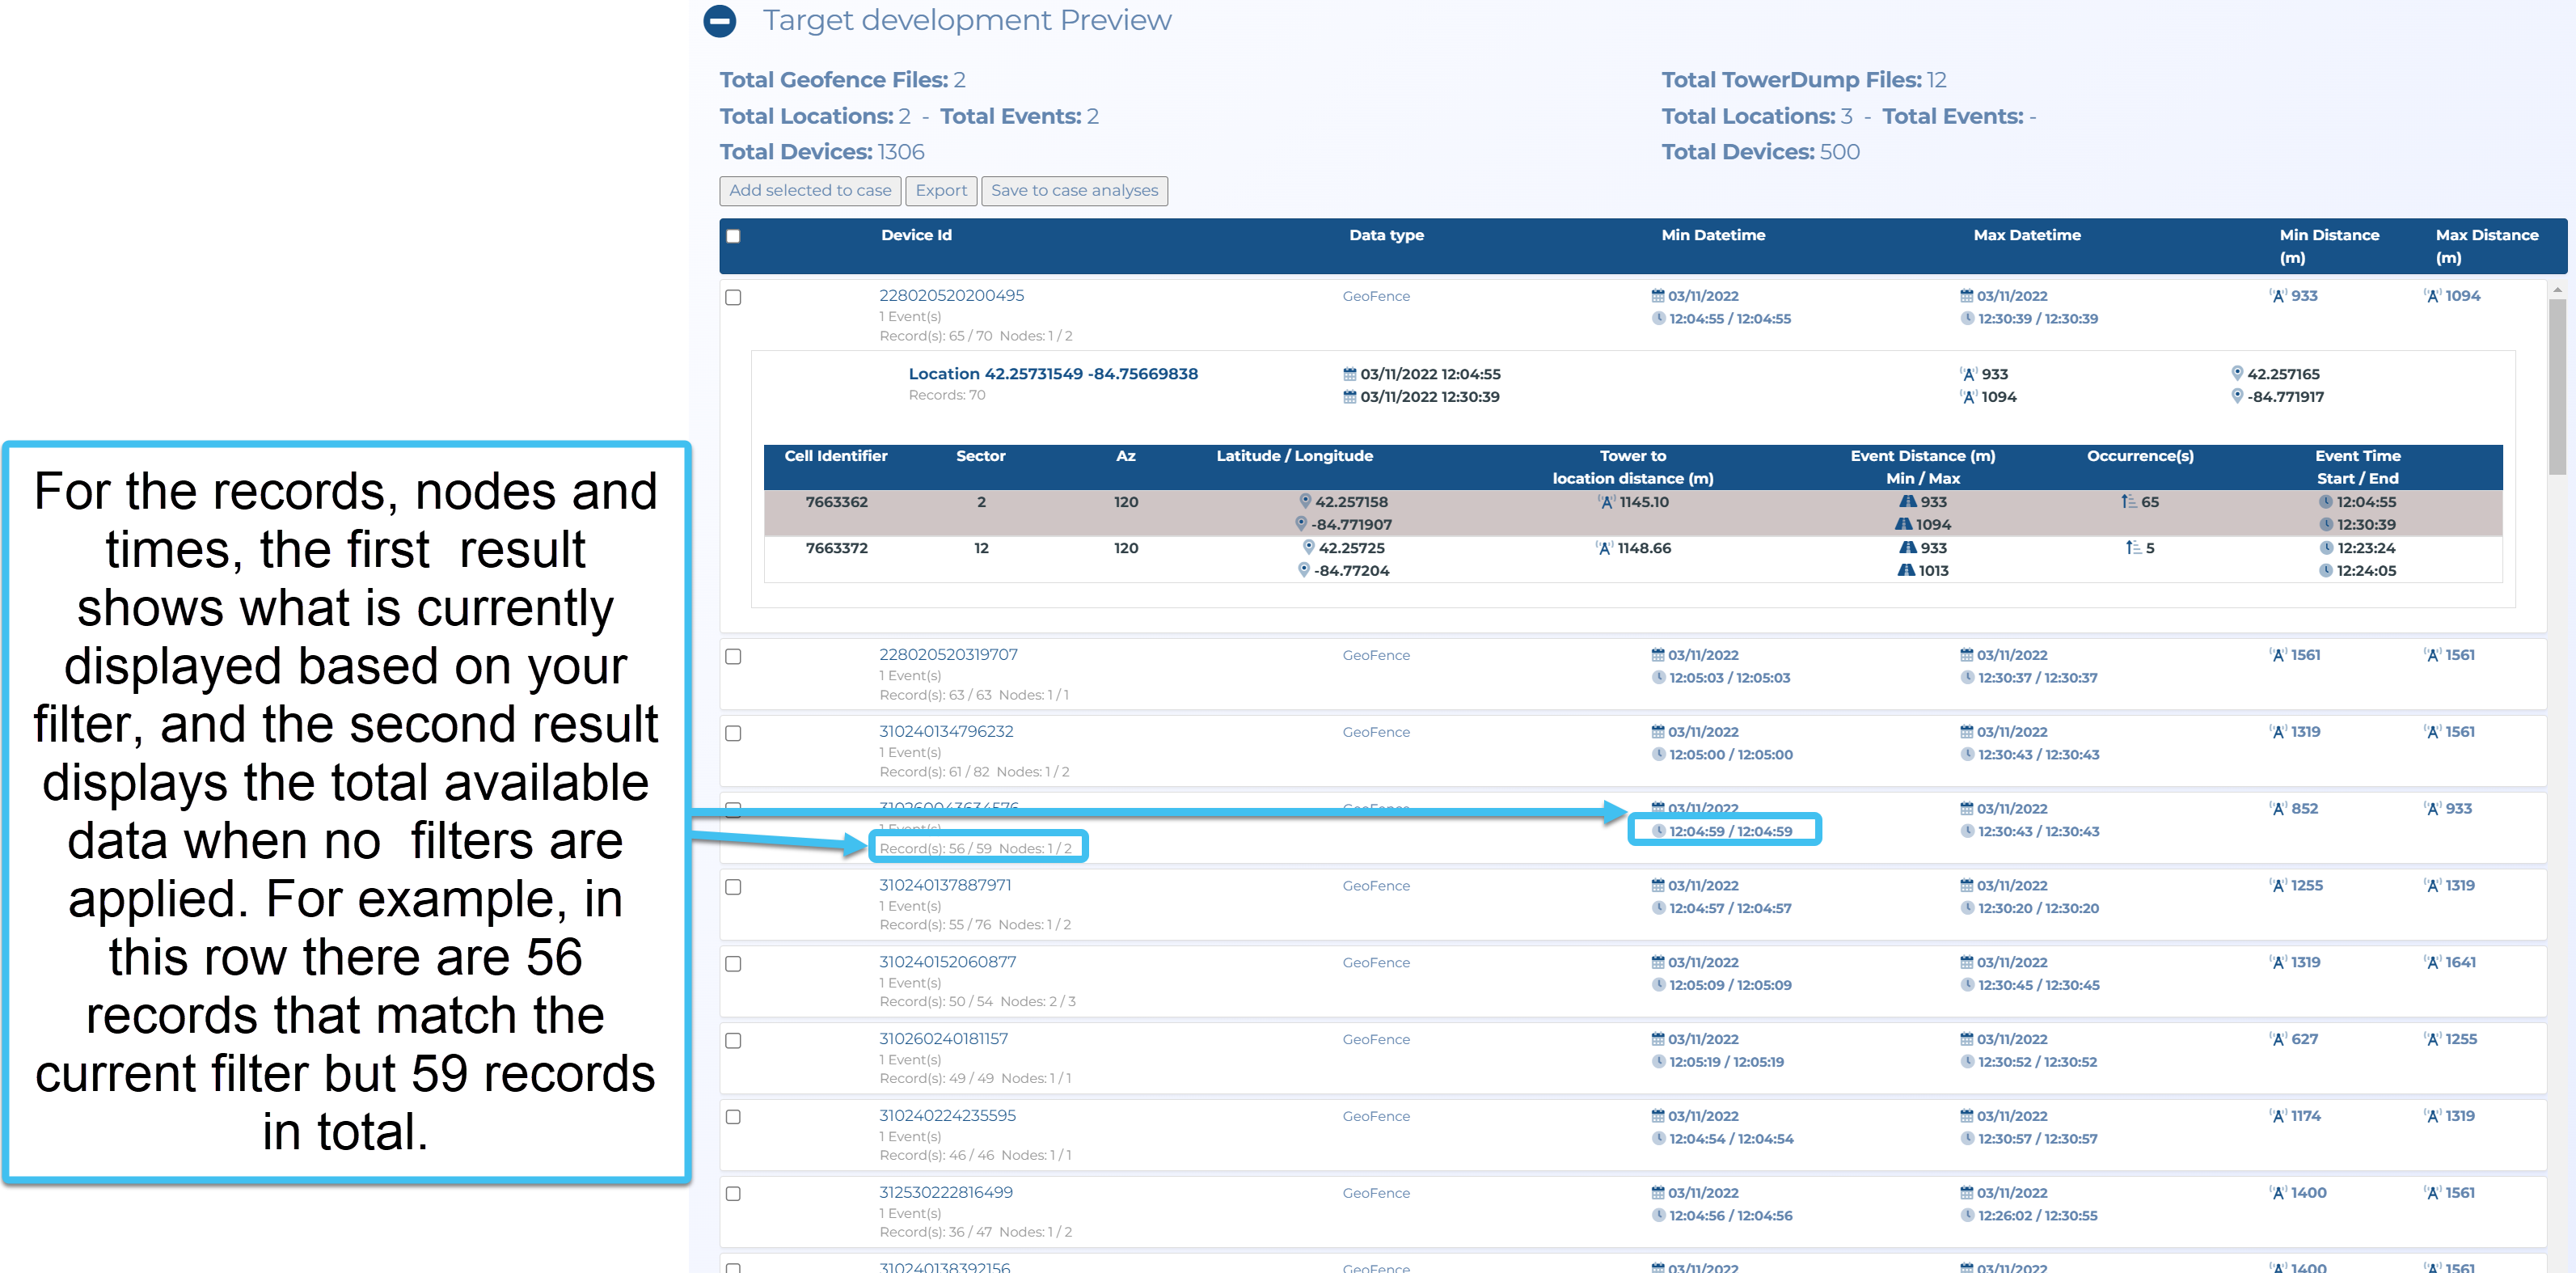
At the bottom of the Manage files screen, click
 alongside Target development preview to expand the tab. This tab displays the target development analysis results for all the devices that were at the case events. With cases involving multiple events, the number of events identified is more important than the number of records. The Site(s) number is the number of cell sites that fall on a location, or a location with its buffer. Devices in the higher number of sites may be of more interest in your investigation. Therefore the results are ordered by the number of events the device was present, then by the number of unique sites, so that the devices that are of most interest to you appear at start of the table. Above the table, there are separate summaries for the geofence data and the tower dump files. Each summary lists the number of: files, locations, events and devices detected.
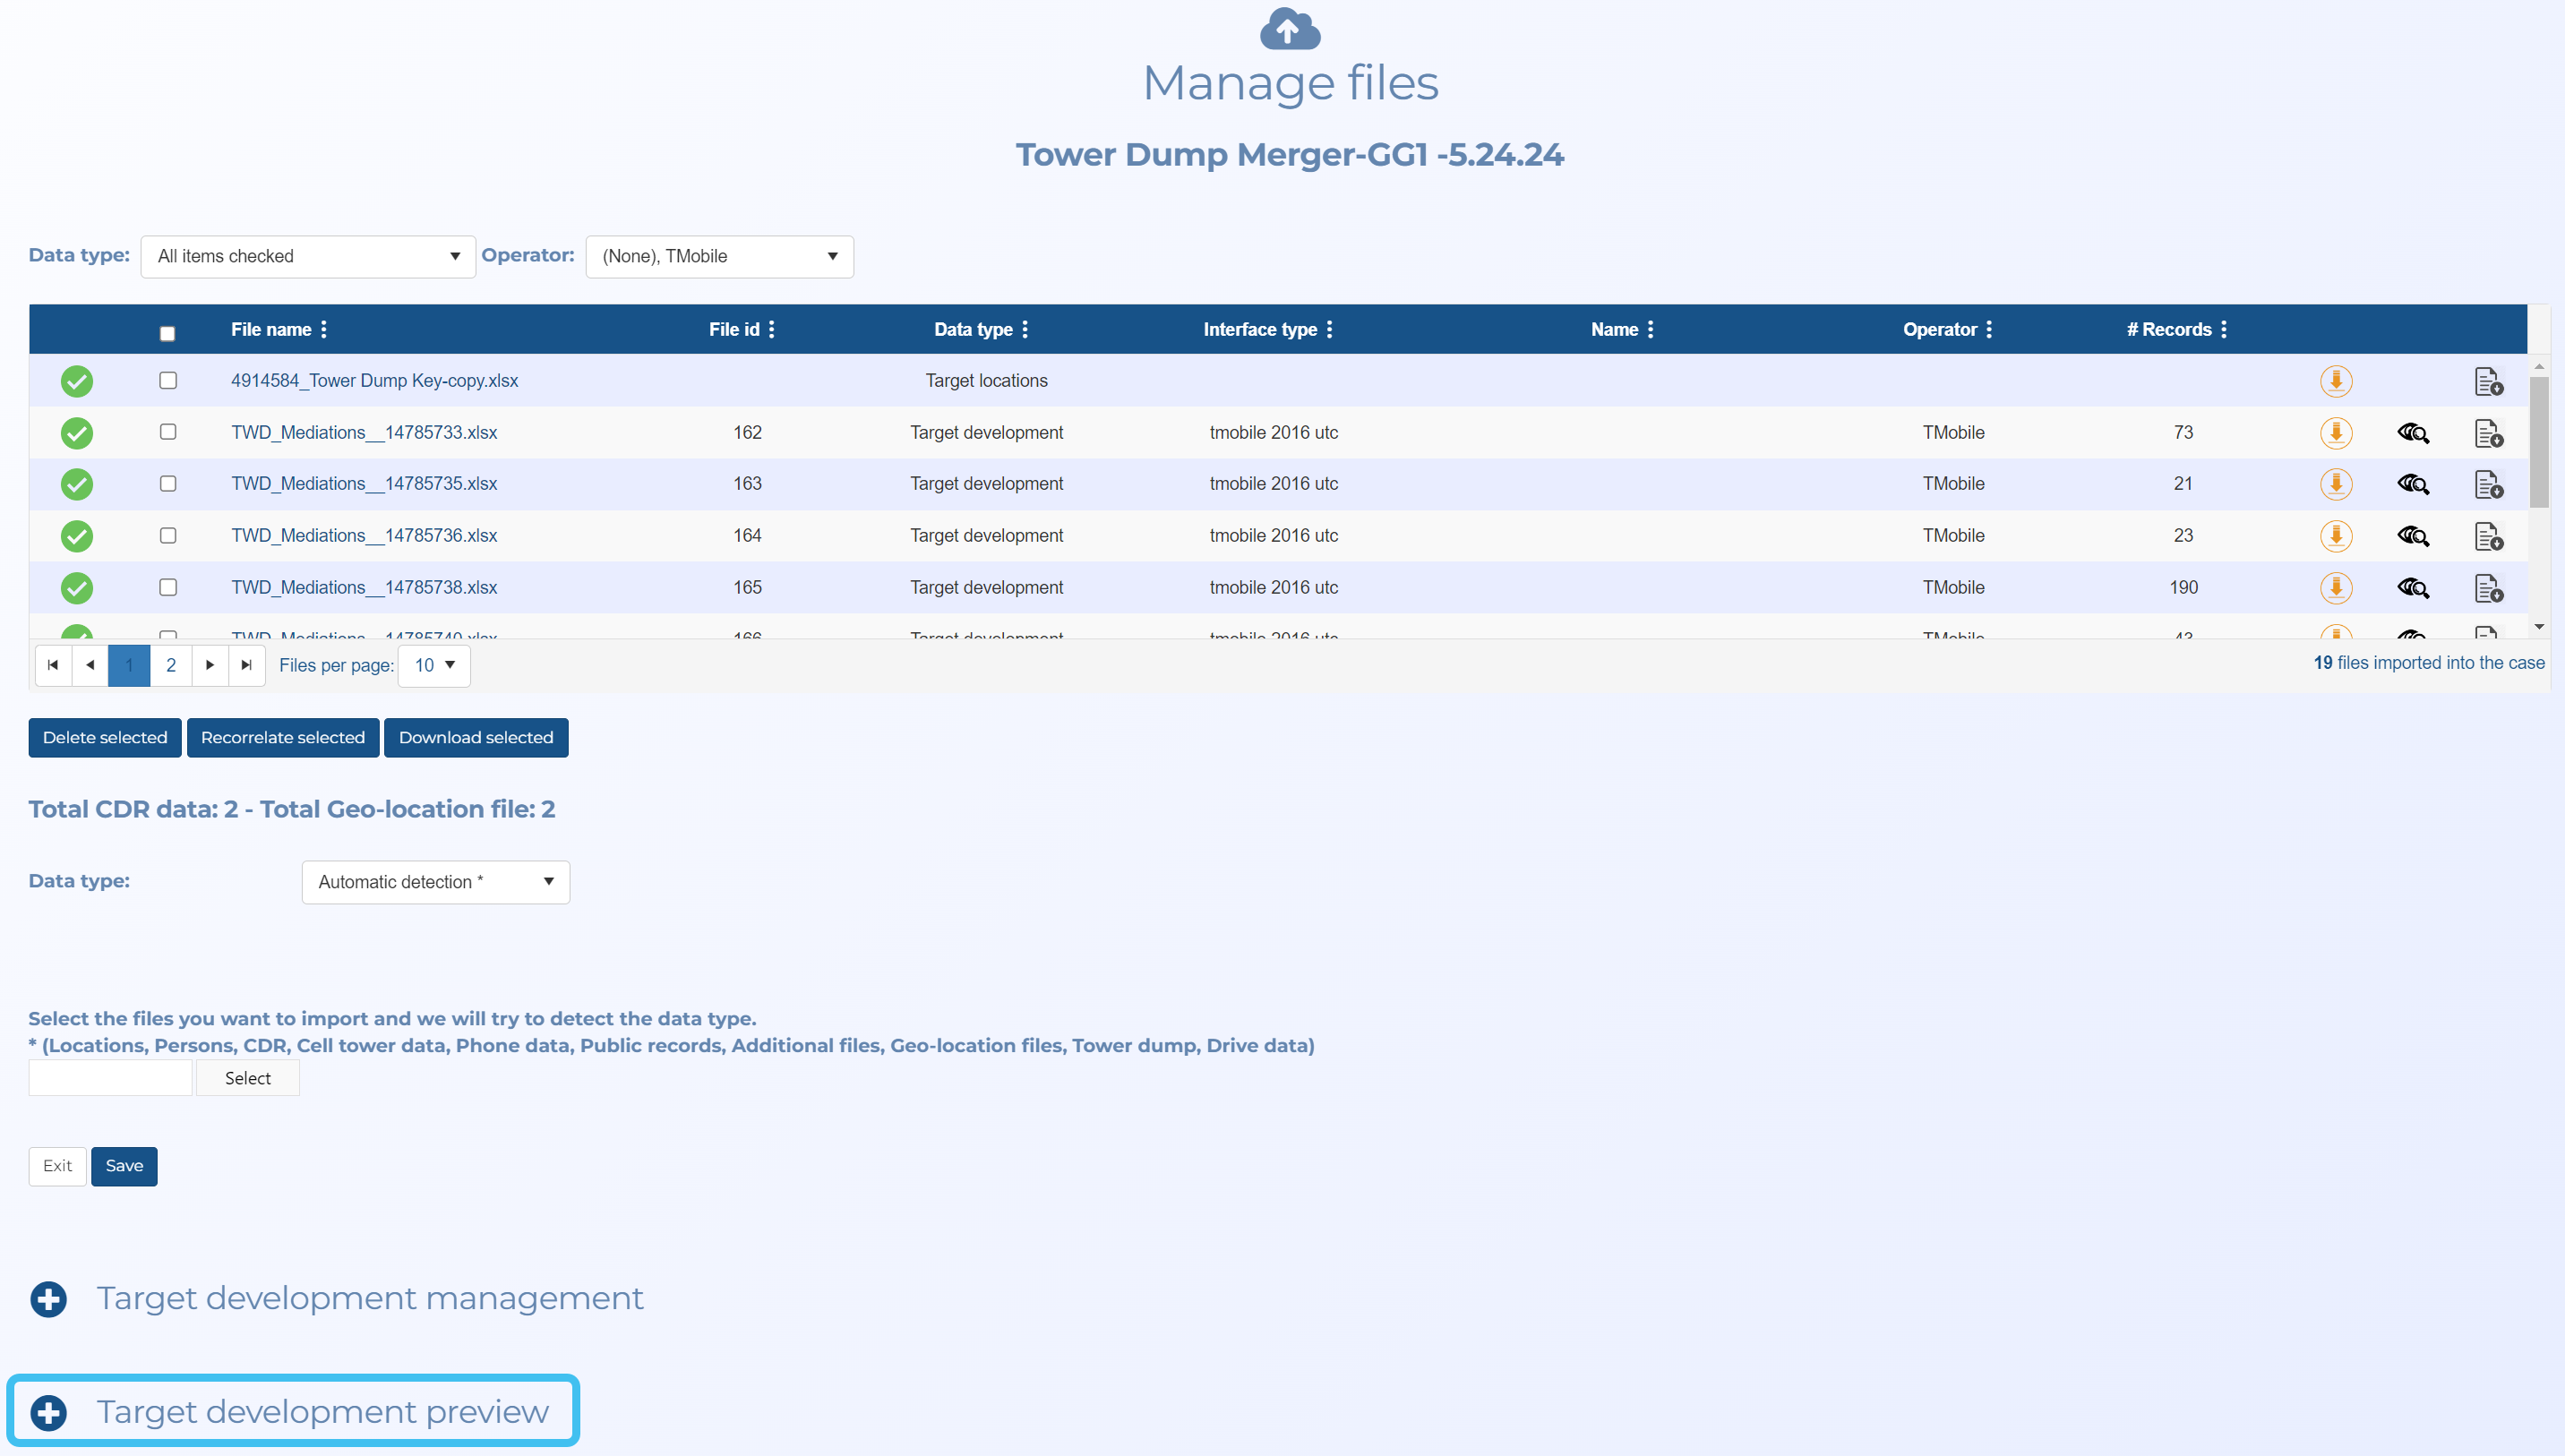
You can investigate the analysis data using some of the following suggestions:
-
To find devices that were located at multiple events, expand the Location filter to the right of the screen and select the number of events. You can also use Event id to filter by event.

-
The filters to the right allow you to select what you want displayed in the Target development preview table. These filters allow you to filter based on one or more device identifiers, operator, data type, target buffer, location and the number of events and the events a device was found, cell identifier, sector, azimuth, intersects and correlation..
Device id: if you have a device id you are interested in, and want to know if it was at any of the events then you can enter it here, then click Apply. If the device was at any of the events then it is displayed in the table.
The intersect filter is a powerful filtering tool which allows you to filter on four types of intersects:
-
Sector AZ and Location: filters for devices within the sector azimuth and the location including its buffer.
-
TA Arc and Location: filters for devices whose timing advance arcs intersected with the target location.
-
TA Arc and Location Buffer: filters for devices whose timing advance arcs are within the defined location buffer.
-
GPS Ping Location Buffer: filters for devices whose GPS pings are within the defined location buffer.
-
-
In the table, click on the device id, displayed in the Device id column, to show additional information.
-
If there are devices you are interested in analyzing further then you can add them to the case. To do this, select the check-box alongside the devices then click Add selected device to case. This adds the device to the case using the device id to identify it.
-
If you are only interested in analyzing your filtered selection in the ESPA analysis center, then you can click Save to case analysis and enter your analysis name.
-
-
If you want to export data you can either export all the device data, or select the devices whose data you want to export using the check-boxes at the start of each row on the Target development preview table. The data is exported into two files; one with all the devices of interest and another with the data by location.
-
If you then want to view and analyze the data on a map, at the top of the screen click
 to open the case in the ESPA analysis center.
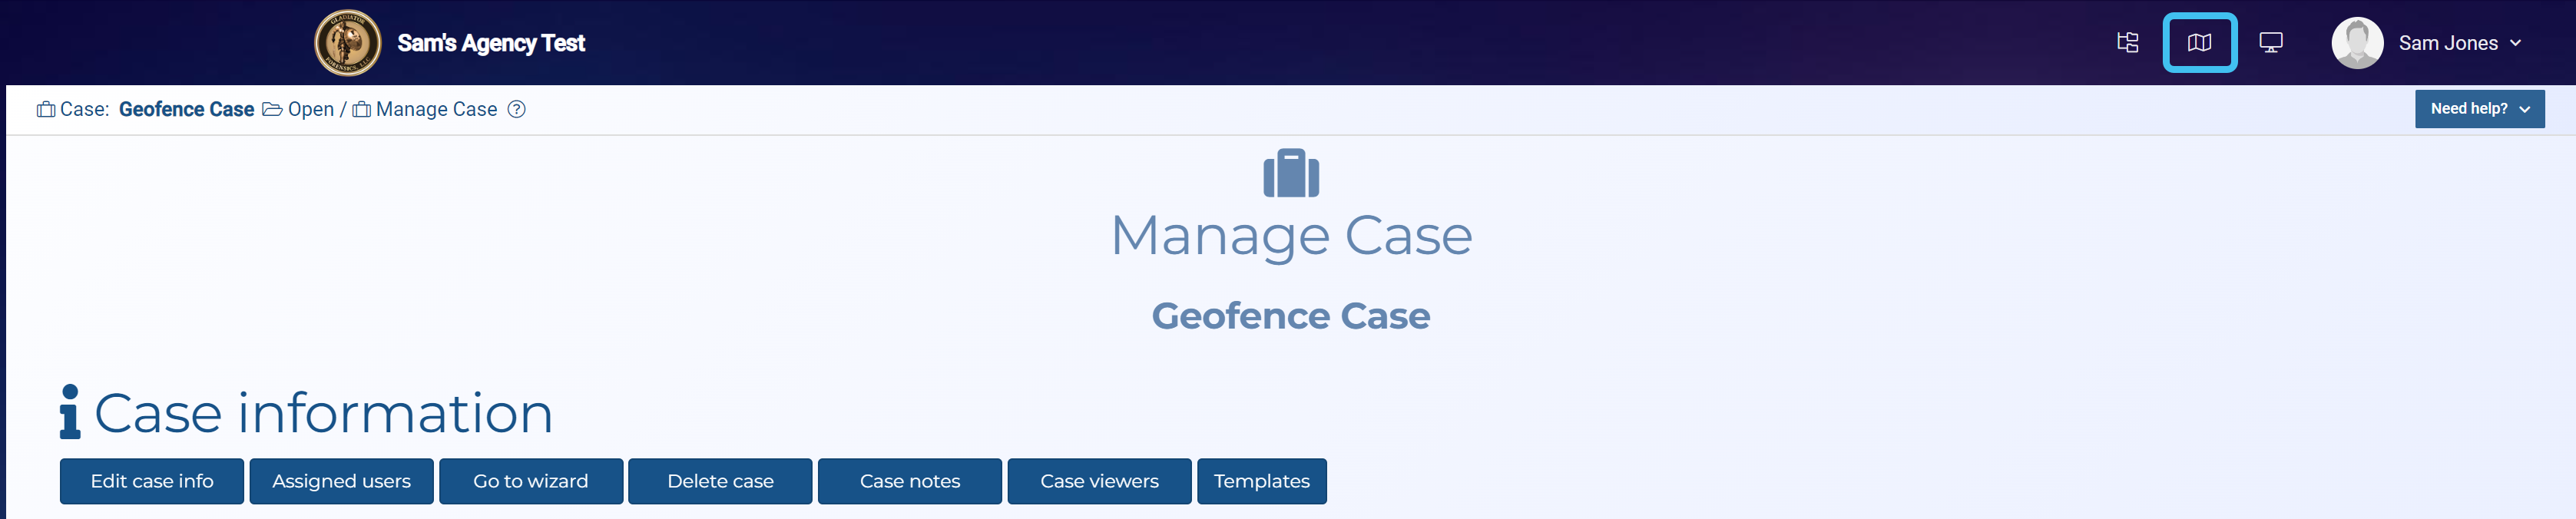
-
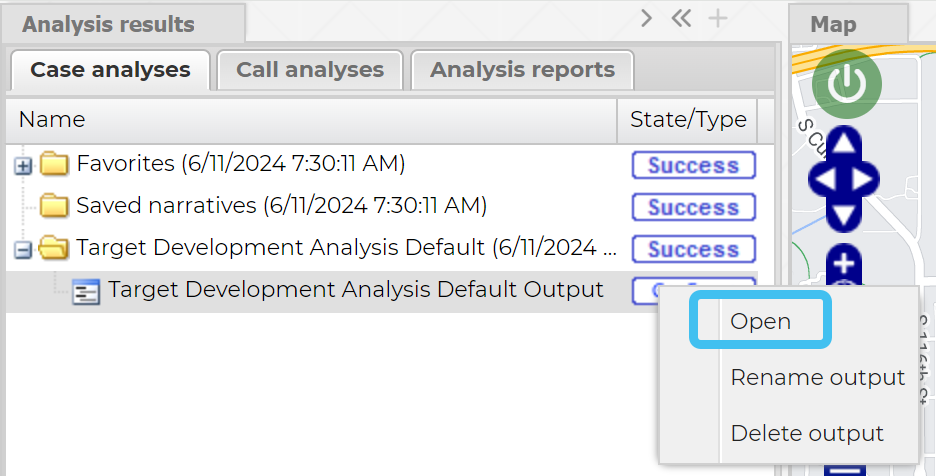
On the Case analyses tab, expand the required Target development analysis folder, right-click the analysis and select Open. Note the default analysis is titled Target development analysis default but there may be others listed if you previously used Save to case analysis.
-
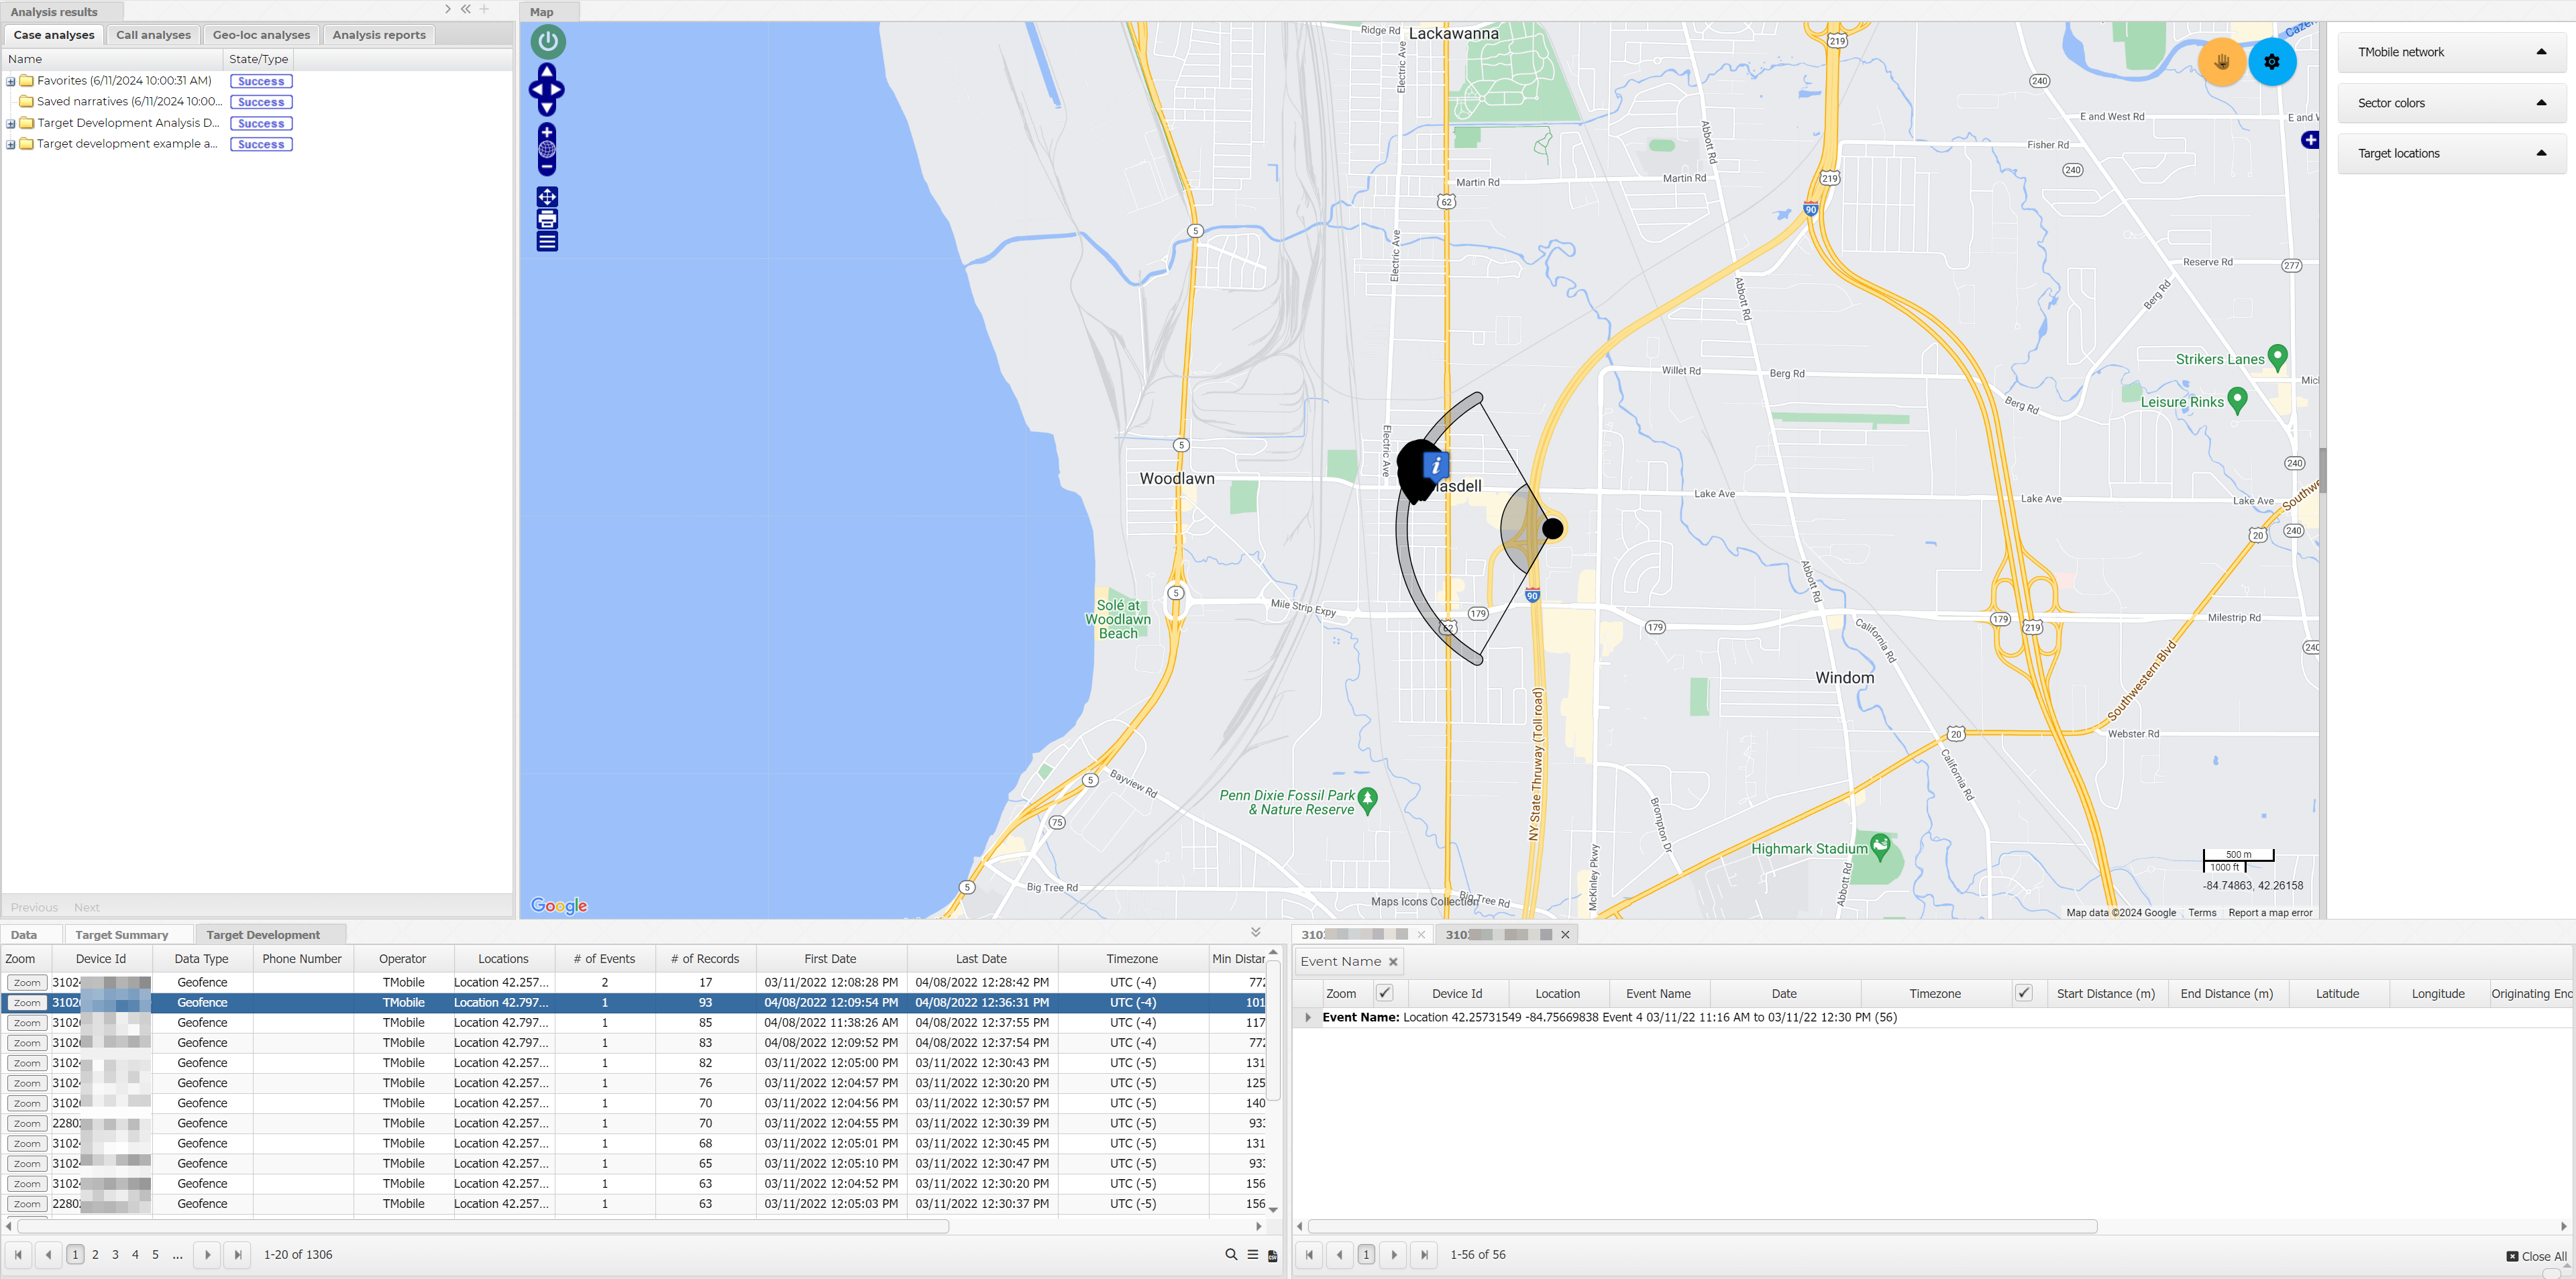
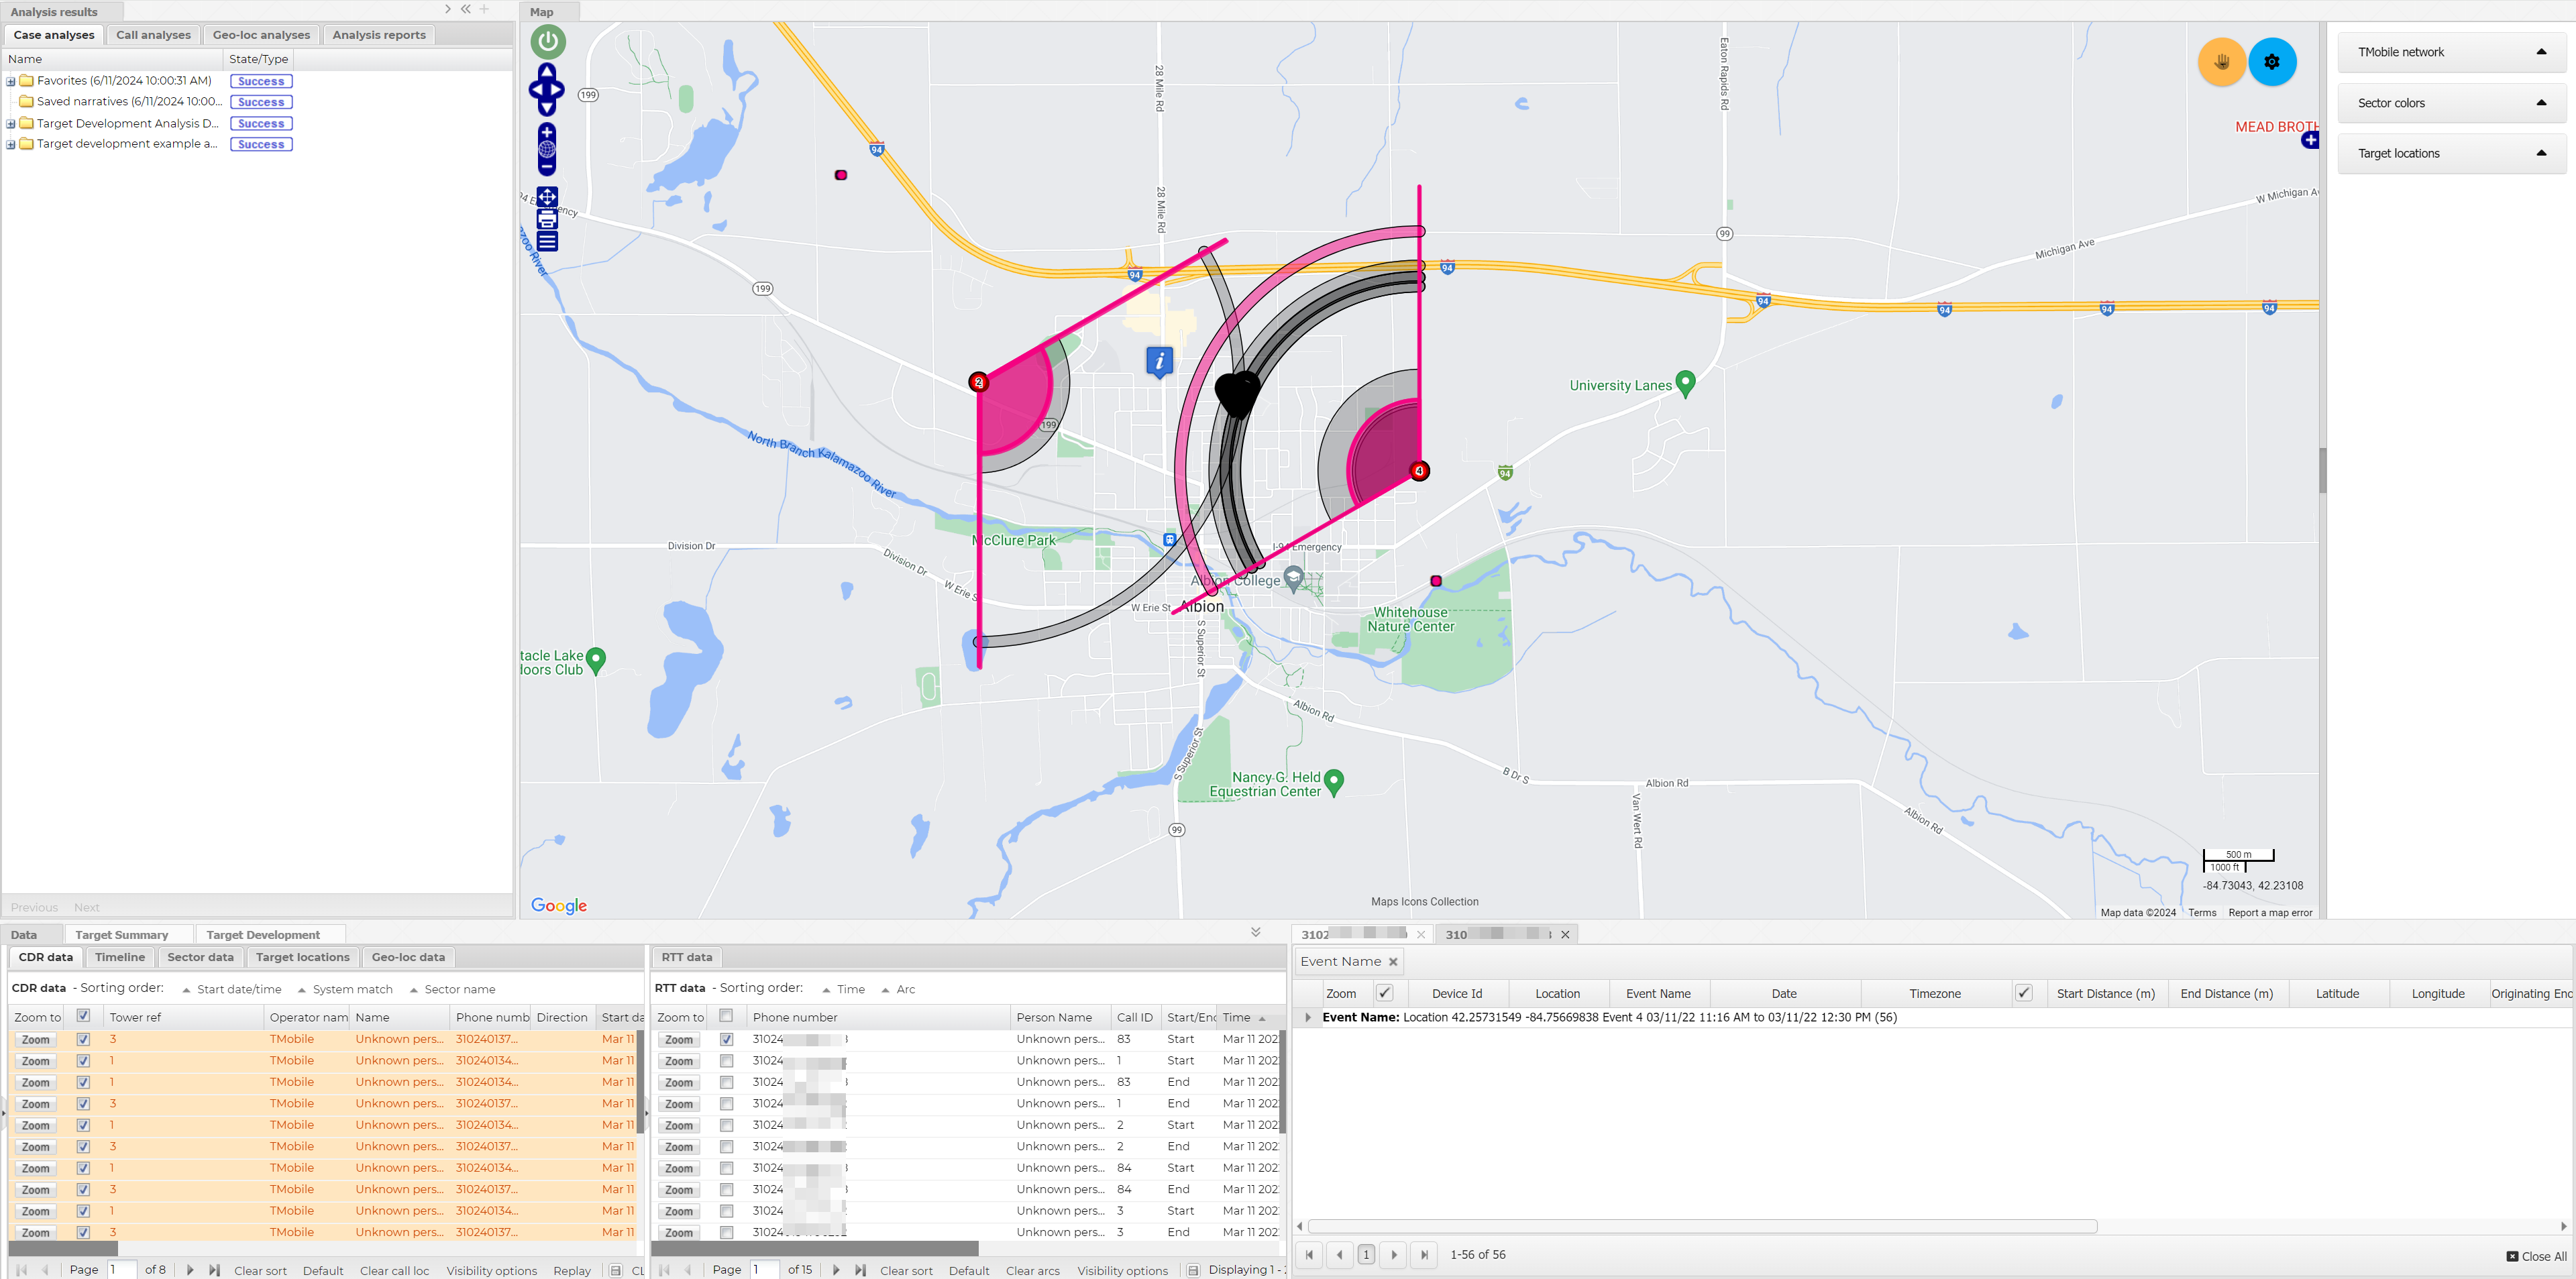
You can now view the analysis on the Target development view and view the cell site and TA locations.
Click for more information on the Target development view
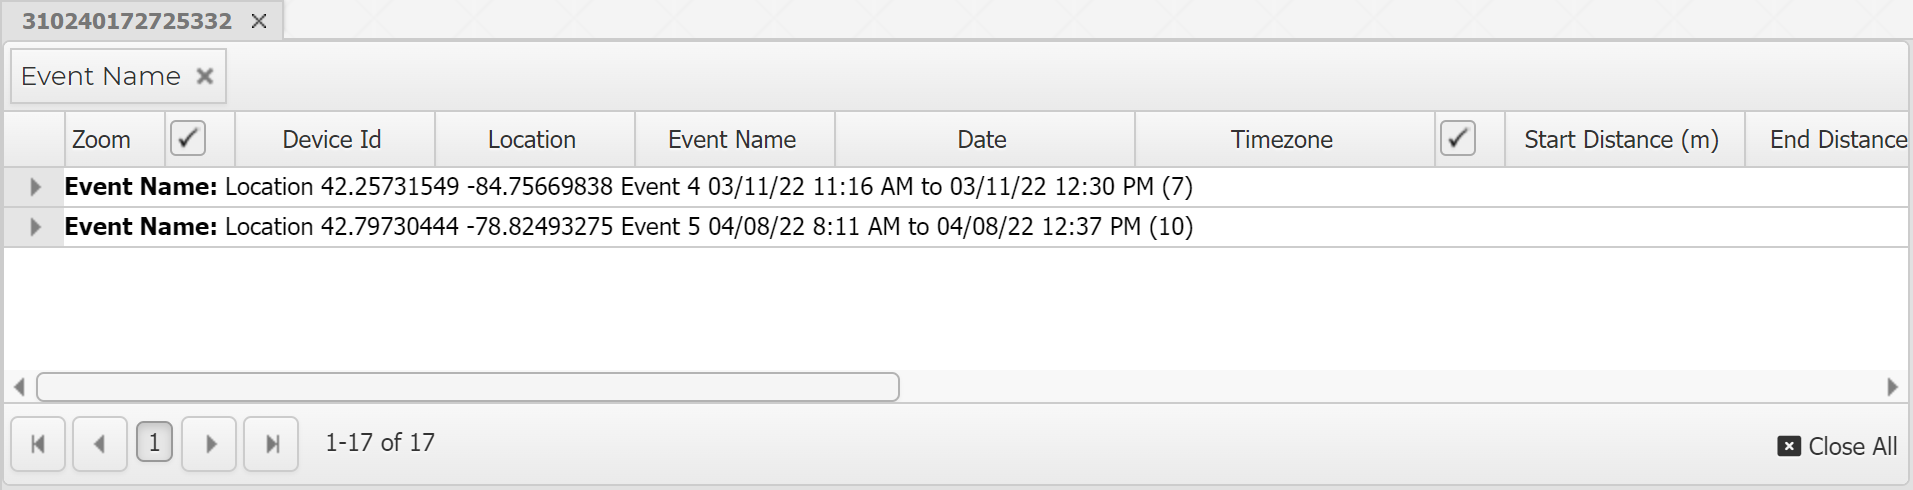
The results are ordered by the device at the highest number of events, then by the highest number of records.

Left-click on a row to open a tab that displays all the events for that device. The tab is titled using the device's identifier. By default the tab groups the records by event. You can use the check-boxes to display the tower and the arcs on the map. Viewing the on the map can help you further identify the device of most interest.
Any row displayed in pink with red text, indicates the location information for the record could not be found in the cell tower data file. If a significant amount of the data is displayed in pink it means your investigation is less detailed and therefore less valid and you should consider sourcing and uploading new cell tower data files.
Right-click on any row on the Target development tab to display Add device to case which allows you to add the device to the case. When you do this:
- if the device identifier is not already in the case then they are added to the People and devices screen. By default they are named using "Unknown person - <device identifier>".
- call records are added to the Case files section of the Manage case screen. By default they are named "Target development data - <device identifier>".
-
call records are added to the CDR data and Timeline tabs. You can then use them as you would calls from a CDR file. They are also included in the analyses on the Call analyses tab and are included in any link analyses that you run.
Note that if you have a geofence file containing only an IMSI but no phone number, and you also have a tower dump file with the same IMSI which includes the phone number, then the Target development view displays the phone number from the tower dump file alongside the geofence data.
-
If you want to create an IQ packet report containing a target development analysis then create a custom report from the Custom IQ packet report settings screen containing the Target Development (Through Geofence/Tower dump ) IQ packet. The default analysis is always available but there may be additional analyses if you created any using Save to case analysis on your filtered selection. To select which analysis is used in the report, click
 then select from the available analyses.
For further information on the contents of this IQ packet refer to Target Development (Through Geofence/Tower dump).